Showing posts with label Stash Buster. Show all posts

Sunday, 7 February 2016

Crochet It - Stained Glass Blanket

Hello, I hope 2016 is being kind to you!
Today I want to introduce you to my first finished project of 2016, it's been a long time in the making so I am very, very glad that I can finally call it finished!

~ Stained Glass Granny Square Blanket ~
Stash Buster & UFO

I first blogged about this project back in 2013, as part of my UFO Hall of Shame, but that's not when I started this project it was actually way back in 2011 that this project first came to life!

The Butterfly Balcony - Stained Glass Granny Square Afghan Blanket Pattern


 Pattern: None I winged it! 
Essentially 24 Granny squares joined and then bordered with rows of granny square shells 
(two double crochet stitches then a single chain - triple chain on corners) 
until the desired size is reached then a scalloped edging is added.
Ingredients:
3mm Crochet Hook
Lots of yarn in various thicknesses
Stitches Used:
Puff Stitch // Granny Square // Scalloped edge
Joining Granny Square

It began as a way for me to relax whilst living amongst the boxes shortly after moving home. There was no TV or internet access for about a month and so in the few minutes each day, after reorganising boxes, cooking dinner and falling asleep on the uncomfortable (all we had) dining chairs, I did a little crochet!

The Butterfly Balcony - Stained Glass Granny Square Afghan Blanket Pattern

Now you might not notice it from the finished object, as it is a little different, but my inspiration actually came from, one of my favourite TV shows, The Big Bang Theory. Amy Farrah Fowler has a lovely Granny Square afghan on her couch which is all edged in black and it seemed like the most suitable project for using all the granny squares I had made!

Sonja Flemming/CBS ©2012 CBS Broadcasting, Inc.
( Image Source and Pattern from the Geek Mom blog )

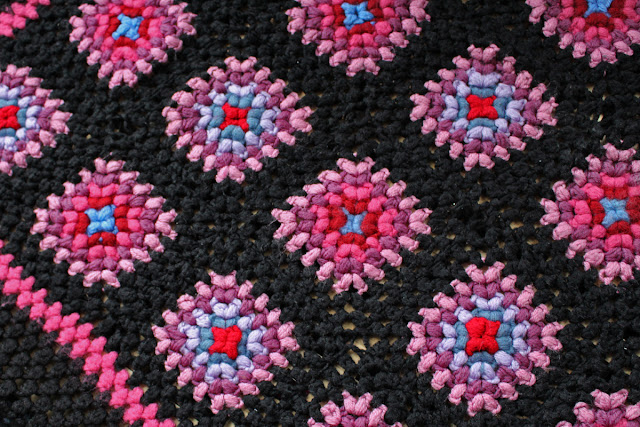
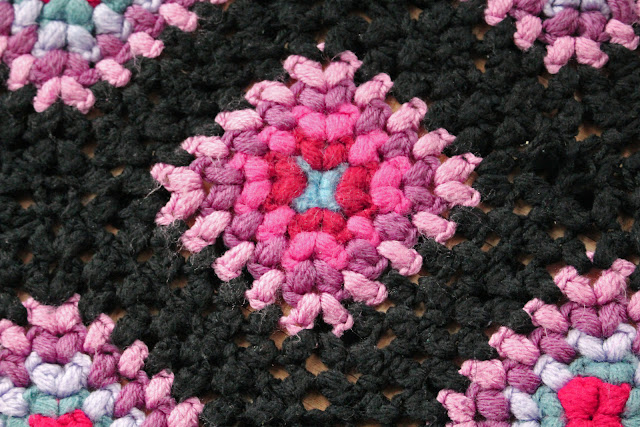
It's worth noting (probably because I didn't have the internet to hand) that rather than doing a double/treble crochet stitch shell typical of the granny square, I mistakenly did a puff stitch square instead. I can only think to blame muscle memory, as the last thing I had turned out with a crochet hook was my puff stitch beret so my hands just naturally resorted back to this stitch! My mistake was realised only once I began joining the squares together, and though it's not a massive problem the reason a  puff stitch suits beret making is the fact it creates a slightly domed rather than a flat fabric and so my little granny squares have created more of a lumpy (or as I have been referring to it nippily) fabric than I had desired, but heck it's just as cozy!

The Butterfly Balcony - Stained Glass Granny Square Afghan Blanket Pattern

After crocheting 24 squares I got a bit bored and so decided to just get cracking and start joining them together (which I did 2 New Years Eves ago). I then to make the blanket a more useful size I decided to encompass the squares with rows of double crochet, mostly using black but occasionally adding a couple of rows of one of the colourful yarns from the centre, I think it's worked out quite well it's certainly striking and the border thankfully has certainly helped to flatten down the puffy squares a little.

The Butterfly Balcony - Stained Glass Granny Square Afghan Blanket Pattern

And that was how it was left for 2 more years (I don't like to rush anything!). It was only on New Years day, this year that I finally added my last few rows of black to the border and then added the pink scalloped edging, which is something my mum showed me how to do and I must say finally makes me feel like I might have a hope of getting better at this crochet malarkey!

The Butterfly Balcony - Stained Glass Granny Square Afghan Blanket Pattern

Now it's finally finished I am rather in love with it, I just adore how striking it is it and it's certainly helped brighten up a rather dull beige sofa! In hindsight I wish I had made it just a little bigger, so that I could swathe myself in it on chilly evenings, but it fits the sofa nicely and keeps my knees warm while watching TV and plotting my next project, and lets face it seeing as it's taken me five years to get this far I think I should count my blessings that it even covers my knees!

Wendy x

Monday, 2 September 2013

Things to Make and Do - Fall For Cotton A Sewing Challenge

Have any of you joined the Fall for Cotton Challenge created by the loveliest of lovelies Tasha and Rochelle?

Fall For Cotton 2013 A Sewing Challenge

Obviously, I have and I can't wait to get cracking. For me, it could not have come at a better time as on Friday the BF boarded a flight to Australia, which means for the whole month of September it's just me, the cat and the sewing machine to keep us company. I am a bit sad I can't go too, but I am firmly focusing my energies on enjoying the next few weeks by spending it on some me time! Having no guilt at lavishing a whole day on sewing, when I probably should be doing something more responsible like cleaning or cooking, will be just lovely!

So on to what I plan to make, well I have three things in mind which I would love to be able finish in time for the deadline, fingers crossed. First up is a blouse, which the minute I saw I just fell in love with! I finally got around to watching ITV's Lightfields a few weekends ago, (one of my OTT full fashion posts will follow soon, my, my there are some lovely knitted's!) and was hit with a overwhelming desire to copy two things Eve wears the first being this blouse.

Fall For Cotton A Sewing Challenge LIghtfields Blouse pattern
I love the way the stripes change direction across the yoke (and line up) and I love the way the black collar and cuffs picks out the black in the pattern! The original looks like a chiffon/crepe, but I am sure cotton will work just as well!
Fall For Cotton A Sewing Challenge LIghtfields Blouse pattern

Isn't It cute!!! I have decided to use my tried and tested 'Dream Pattern' which will need a few tweaks to make it just right (lengthening the yokes and adding cuffs to the sleeves) but I think I am up to the job and it should look great when done!

I really wanted to find the perfect fabric for this blouse and thought it would be easy, it wasn't. I searched through every version of cotton striped fabric available online, and there were some lovely designs, but most of the best ones had only fat quarters left and at about £4 each plus postage!

Fall For Cotton A Sewing Challenge LIghtfields Blouse pattern

Eventually, I stumbled upon some gorgeous 1930s fabric from Blue Zinnia Vintage on Etsy (she has some really beautiful fabrics) which I think will be just perfect. It's the most I have ever spent on fabric (the luxury of having lived in Walthamstow all my life, I guess) I actually felt my usual queasiness, at parting with my cash, but once I realised that it would actually work out cheaper than some of the modern quilting cotton I'd been pondering, it set my mind at rest. I just hope I can do this beautiful vintage fabric justice! I still need to get some black cotton for the collars and cuffs, a trip down to Walthamstow market this weekend is in order, I think!

The second are these, high waisted bottle green velvet or corduroy trousers! 

Fall For Cotton A Sewing Challenge LIghtfields 1940's Slacks/trousers/pants pattern
Admittedly this is not the greatest view of them, but you can get the idea! I am still undecided as to whether they are made from velvet or corduroy, as you never really get a good enough look at them.
Fall For Cotton A Sewing Challenge LIghtfields 1940's Slacks/trousers/pants pattern

They are so Autumnal and make me wish I still worked as a groom, I would love to stomp about the stable yard in these! My idea is to use three patterns (fingers crossed) Gertie's Capri Pants - for the pockets, Simplicity 4044 - for the front pleat and tried and tested Simplicity 3688 - for the waist band.

Fall For Cotton A Sewing Challenge LIghtfields 1940's Slacks/trousers/pants pattern
Ambitious? Definitely. Doable? Hopefully!
I have chosen some bottle green corduroy from a seller on Bay and as soon as it arrives I will start figuring out my pattern!

The last garment has nothing to do with Lightfields but is a well overdue stash buster.

Fall For Cotton A Sewing Challenge Butterick 5880

I want to make a version of Butterick 5880 in some cotton from my stash I have this beautiful 50's brushed cotton bedspread, which I got for £2 in a charity shop last year on the Isle of wight, which I think will be perfect! This is kind of my back up pattern if the above two give me trouble, I know I will still have something to fall back on and rather helpfully this pattern comes with a video tutorial, which should mean I have no excuses for getting stuck!

So there you have my ambitious sewing plans for the coming month, along with making some chutneys and jams from my ever growing allotment bounty, plus having just started knitting a Jan Sweater I'm pretty sure I'll be kept nice and busy for the whole of September!

Wendy x

Thursday, 18 July 2013

Things To Make & Do - Mathilde

I made the most of the super sunny bank holiday at the end of may to stay at home and get on with some of the things I have been putting off or to one side lately, in favor of allotmenteering.
Collage of Images Sewing listening to the walker brothers record knitting and gardening
My weekend was spent: Sunny Sewing // Spinning Records // Wartime Farm Knitting // Grumpy Gargoyle watching (I mean look at that face!) // Free Plant receiving - I have the best friends // Dancing shamelessly around my kitchen to Herb Alpert & The Walker Brothers - just like being at a 60's cocktail party!

I had been expecting the May bank holiday to be another rainy affair, there are a few things you can rely on in England and rainy bank holidays are usually one. This meant the only plans I'd made were to stay inside and keep as warm as possible. So the glorious sunshine took me by surprise, we usually like to go off exploring when the weather's right, but as much I love visiting interesting and beautiful places, I must confess I really enjoyed having a whole weekend dedicated to just staying at home, making the most of the space we now have to do all of the above, which means I've actually done some sewing to blog about, hurrah!

Mathilde - A Button Back Blouse
(Stash Buster)
Pattern: Mathilde - £7
Ingredients:
Fabric – 2 yards/1.9m x 60”/150cm OR 2 ½ yards/2.2m x 45”/115cm 
Matching thread 
Lightweight fusible interfacing 
7 x 5/8” / 15mm buttons

Recently I was given some floral printed blue cotton mix fabric by one of my Mums friends. I knew that its lovely drapeyness would mean it would make a cracking blouse, though I also knew the 40s patterns I am usually drawn to would not really have suited its flamboyant floral print. So I left the fabric to one side and put it on the back burner, it wasn't until I saw Tilly's cute button back blouse pattern which I knew it would be perfect for this fabric!

Mathilde Blouse Sewing whilst listening to 60's records

It soon dawned on me that 'Mathilde' required quite a bit of fabric for those lovely billowy sleeves, sadly on closer inspection I realised I had only 1m, which no matter how hard I tried to fit the pieces into it, (and I really did try) there was never going to be enough. Drat! After a bit head scratching I remembered I had some remnants of heavy satin fabric from my 50s Butterick sunburst tuck dress which was a close colour match and though a completely different weight and makeup, I hoped would work for the yoke and sleeve cuffs!

Mathilde Blouse Fabric dark blue satin with a large floral fabric

As you will see from the pictures below, I ended up using much more of the satin than I had anticipated. It worked out that the whole back section, as well as the front yoke, would have to be blue satin as once the sleeves were cut, there was nowhere near enough floral fabric left, so as a compromise and to get as much as I could of the floral into the back I created a back yoke.

Mathilde Blouse Finished Front View
Front View
I marked the break at the same level as the front yoke and added a seam allowance to both sections. I actually surprised myself, by it working really well and it all matched up perfectly, which is rather unheard of where I'm concerned!

Mathilde Blouse Finished Back View
Back View
Once I had all my pieces figured out, it went together like a dream, Tilly's detailed instructions certainly ensured that. I have to admit it's the first time I have ironed everything, constantly through the whole process, and I really think it paid off. It's also one of the quickest things I have ever made, I took just over an afternoon to finish from cutting to sewing the buttons on, which is honestly a record!
The Butterfly Balcony - Bank holiday Sewing - Mathilde Blouse Finished
I don't know if it was my choice of musical accompaniment, the bold floral print or the pattern (or all three) that has given this project have a very 60's feel, which I love and as long as the weather stays warm I know I will be wearing it a lot over the next few months!

Wendy x

Thursday, 23 August 2012

A Sunny Sunday, A Red House & A Pink Dress

Wow, the weather here last weekend was shockingly good*, so for almost the first time this year, we actually made an effort to venture out for the day and do something more fun than our weekly food shop! It was also the perfect opportunity to 'Crack out my Sunday Best' which finally could be a summer dress!

We decided to take a trip 'saaf' of the river to Red House, in Bexleyheath which is the former home of William Morris founder member of the Arts and Crafts movement. Now owned and preserved by the National Trust. I have loved William Morris since I was a child, probably due to growing up a stone's throw from his childhood home in Walthamstow, I've been brought up on a diet of arts and crafts and twiddly botanic wallpapers, so this really was a perfect choice for me. There is not a huge amount to see regards artefacts, but what there is, it's impressive.

When we arrived we were a bit confused when the sat nav lady said, "you've reached your destination" as the house now sits in the middle of a housing estate, it is really not where you expect to find such an elegant property. But once we found the entrance in the red brick wall, I was enchanted by it. It is a truly beautiful place, it's an oasis of art history amongst the suburban sprawl. When it was completed in 1860, it was described by fellow artist Edward Burne-Jones as 'the most beautiful place on earth' and he was not wrong, just see for yourself...
The house was built for Morris with designs by Philip Webb who chose to work in the Victorian Gothic style to reflect Morris' love of all things medieval.


It is a most noble work in every way, and more a poem than a house, but an admirable place to live in too' [Rossetti]

“If you want a golden rule that will fit everything, this is it: Have nothing in your houses that you do not know to be useful or believe to be beautiful.” [Morris]


The Aphrodite embroidery was created as one of 12 female figures, inspired by Geoffrey Chaucer's poem The Legend of Good Women, to decorate the Red House. The design was drawn by Morris and embroidered by his wife Jane, her sister Bessie and their artistic friends.
Glass Mosaics depicting the seasons (Spring to Winter) installed in front door during the repainting in the 1950's
Morris wanted to create a 'Palace of art' were he and his artistic friend could be creative. 'It featured ceiling paintings by Morris, wall-hangings designed by Morris, furniture painted by Morris and Rossetti, and wall-paintings, stained and painted glass designed by Burne-Jones. 
Stained Glass by Edward Burne-Jones

"The past is not dead, it is living in us, and will be alive in the future which we are now helping to make." [Morris]


'I know a little garden close 
Set thick with lily and red rose, 
Where I would wander if I might 
From dewy dawn to dewy night. 
And have one with me wandering.'
[Morris]
Sadly Morris and his family only lived at Red House for five years, as they were forced to sell for financial reasons.  After leaving Morris said that to see the house again would be more than he could bear, which is understandable it must have been like leaving a huge piece of himself behind.


My Sunday Best was a recently finished Stash Buster, made using Butterick 5748. Though it was made as a wearable muslin and it has some irritating fit issues, I think it's my favourite dress so far!

We rounded our visit off with some seriously delicious Fentimans Ginger Beer and a generous helping of Carrot cake. The perfect end to the perfect day!

Wendy x
*You know it's all true what they say about the British being obsessed with the weather, we really are!  It may well be 'the last refuge of the unimaginative' but it if you're ever stuck for something to say to a Brit, it's certainly a topic which will always produce a polite/enthusiastic response!

Tuesday, 31 July 2012

Things to Make & Do - UFO's & Stash Busting

Hello, my lovelies!  A rubbish blogger that I am, I thought it was about time I popped by and showed you the bit of UFO & Stash Busting I have been doing in June & July.

To be honest there has not been that much, two projects to be precise. Most of what I have made has been for others (I know I am selfless), and shockingly I've even started knitting for Christmas, which is wholly unlike me! So a separate post will surely follow with all those goodies...but for now back to the busting

Candy Cane Beach Bra
(UFO & Stash Buster)

I bought this pattern early last year as I wanted to make it up for my summer hols but I never got around to doing more than cutting it out from the fabric, I am lazy!


Created By: Mrs Depew Vintage

Ingredients: 

  • Approx. 0.5 yard Cotton Outer
  • Approx. 0.5 yard Cotton Lining
  •  2 Buttons

There is not really much to say about this pattern as it was very simple and straightforward to make up, just 6 pieces (including the lining) so I really can't think why I took so long to finish it!


I absolutely love the 50's pointed collar on this top
Both the outer & lining (plain white cotton) fabrics were from Walthamstow market at £1 a meter and have been sitting in my stash for a few years, I found the candy stripe quite a little irritating to work with as it refused to match up (see the front seam) but that probably has more to do with me than the fabric!


I used two massive buttons on the back to make it a bit easier to open/close without asking for assistance and to ensure it doesn't suddenly ping open in public. I think I will have to have a go at making up a matching pair of shorts then all I'll need is some sunshine and a sandy beach!


Crewel Love
(UFO & Stash Buster)

I started this embroidery shortly after I finished my crewel embroidery kit back in February I had gone crazy pinning embroidery pictures and was keen to get stuck into something a bit more difficult.

My inspiration came from this 70s 'God Bless Our Pad' I loved it so much I knew I had to try my own take on it.


Source: racheldenbow.blogspot.com via Wendy on Pinterest

Not being the most religious of souls, I felt it would be more appropriate to have a different phrase and eventually I settled on The Beatles lyric 'Love is All You Need' which I think is in keeping with the flower power theme.


Pattern Here: Love is All You Need

Know How:  Split Stitch
                      Padded Satin Stitch
                      French Knot

Ingredients: 
  • 20" x 16" Frame without glass
  • 24" x 20" woven fabric 
  • Odds and ends of yarn
  • Embroidery Hoop or Frame

I've had the frame for years, I saved it from the bin (classy) back when I worked in a photo lab, the glass was missing so it could no longer be sold, but I knew that it would come in handy for something and at last it has.

The backing fabric was taken from a pair of Next curtains a college at work kindly gave to me as they were redecorating and though I could use them, unfortunately, they didn't fit any of our windows, so after much deliberating I decided to re-purpose them as they were the perfect colour and weave for a bit of embroidering.

I first outlined each letter in split stitch, then I used a huge Padded Satin Stitch to fill them in.


I traced my text onto the fabric using a pencil, which I soon learned was a mistake. The white wool was gradually turning grey as I stitched over the outlines, eeek!  Fortunately, I can report after washing it has pretty much gone, phew! Next time I will be using a water soluble pen much less stressful!


Making the most of stitching in the sunshine.
I bought myself a cheap tapestry frame from Hobbycraft as the hoop was just not big enough.
 I improvised the flowers as my embroidery skills are still rather limited I stuck to what I knew  (3 stitches) and kept it simple, but no less effective I think! If I were to make another I would definitely mark out the flowers beforehand as I did struggle to fill some gaps and not have too many of the same colour too close together.


I actually finished the last few flowers whilst watching the amazing Olympic opening ceremony, in between bouts of lump in the throat sobbing that is - what the heck! I had no idea I felt so patriotic - the boyfriend though I was having a breakdown - all I can say is thank goodness for Rowan Atkinson irreverent silliness, making me laugh myself out of it!


It needs a bit of a gentle press to reduce some of the creases caused by washing, and I may add a few more flowers at a later date. But all in all, I think it looks great and well worth the many, many hours it has taken to finish, as I really enjoyed each and everyone, especially those sat in the sunshine!

Oh, and as it's Tuesday I am going to link up to Lakota's Ta-da! Tuesday!!

Wendy x

Thursday, 17 May 2012

Things to Make & Do - Think Pink!

April's crafting seemed to have taken on a theme, it was only when I was collecting all the bits together to photograph that I noticed everything was Pink! (ooh and I have just realised 2 of last months projects were pink too!). Now I have never been a girly girl when it comes to pink, blue is my favourite colour (sky blue) and yellow is my go-to happy paint colour, as two bedrooms and one kitchen will testify, so quite how soo much pink has crept into my fabric and yarn stash is a misery to me. However, it has happened it does mean that this post is well and truly rosy!

 Easter Bunny
(Stash Buster)

I made a few of these a few Christmases ago and never found the photos to show you all so as there is one little lady who was not around back then I have made her own version for Easter! I used Tors tutorial who blogs over at Girl Meets Wolf, which is so simple to follow and easy to do that you will wonder why you never thought of it before!

Pattern By: Tors @ Girl Meets Wolf
Ingredients:
Flat Teddy Bear or Template
 Fabric 
Stuffing
Matching Thread
Beads or Black Thread.


Gingerbread Bunny and Little Ted
For my Bunny version I used Little Ted, he has been my firm favourite teddy for many many years now. I wish I had taken a paper pattern from him the last time I made these as they were much less wobbly of arm and leg, but Keira his (new mummy) loves him in all his wonky glory and calls him the Gingerbread bunny, and I can totally see why!


Welly Warmers
(Stash Buster)

I was inspired to knit these by Charlotte who blogs over at Sew Far Sew Good she made two fantastic pairs for herself and her sister for Christmas and I knew as soon as I saw them I wanted to make some, for wearing at my allotment.
Created By : Jane Richmond
Download Free PDF : Leg Warmers
Know How : Cast on, Knit, Purl & Cast Off.
Ingredients : 100g DK Wool
                        A set of 4 Double Point 5 mm /US size 8 Knitting needles  or
                        A 5mm Long Circular needle or
                        A pair of 5mm needles (just means you will have to sew up the seams)

The original pattern is designed to be knitted in the round on either DPN's or a long circular needle, as I had neither of theses so I knitted them on straight needles and  to account for the sewing together I added 2 extra stitches to the cast on. 


I remember as a child having a red pair of leg warmers with penguins on them which I refused to be parted with, well it was the 80's, as a teenager  though I vowed never to wear them again...whoops!
They are exceptionally easy to make and took me about 4 days to knit up in my lunch breaks at work and then another lunch break to stitch the seams up. Due to using only small balls of wool they are a bit untidy on the inside, but they do the job and I think I may have just about gotten my over my teenage leg warmer phobia!


1940s Counterpane Cushion
(UFO)

You might remember a while ago I posted a pattern for a very pretty 1940s counterpane which I had intended to make into a baby blanket for my best friends newest arrival.


Well, said arrival is shortly to be celebrating her second birthday and of the 48 squares I needed to knit to make her blanket I made......7.....yep only 7 squares! The reason, well I'm not sure, I sort of lost interest soon after I posted the pattern.


Whilst watching Water for Elephants, I decided to knit just one more square, this was not the best idea because me+knitting+TV, never ends that well, something always suffers, this time, it was the film, I have no idea what was going on at all. I did, however, notice the costumes which certainly deserve another a watch. 


So with my 8 squares I decided to make a cushion, I used and old pink pillowcase for the insert (which was left over from my bathroom rug) and stitched 4 together for the front and back sections then joined them all around the edge. I think it is quite pretty and perhaps one day it will have a counterpane to go with it. Maybe!


Gertie's Dirndl Skirt
(Stash Buster)

I have had the fabric for this next project in my stash for years, it is a very pretty floral print from Rose and Hubble London. I loved it so much when I saw it that I bought quite a bit, but because I loved it soo much when it came to making something from it, I couldn't bring myself to cut it, which is silly now isn't it! I realised that the perfect project for busting this much-loved fabric would be Gertie's very simple dirndl skirt, as it is quick to make and requires minimal cutting of my precious fabric!

Gertie's Dirndl Tutorial : 
Ingredients:
A Tape measure
 Fabric you will need approx 2.5 yards
Matching Thread
Zipper 

Rather than making the paper pattern that the tutorial suggests, I simply measured out my fabric to the required size, also I cut the skirt in one piece to mean that I needed to only stitch one seam. Similarly, with the waistband rather than cutting two and stitching them together I cut one piece double the width and folded it over saving myself another seam! Lazy or economical... you decide:)


The zipper insert is interesting  rather than have a button at the top the zip pulls up right to the top of the waistband which sounds like it shouldn't work but does, and rather well especially as it means not having to sew a pesky button hole!


All in all, I love this skirt and I am sure if the warm weather here, last for more than a few hours at a time, I will get lots of wear out of it. One thing I will say is that the fullness of the skirt does take a bit of getting used to as it can make you feel rather big of bottom, but that may well just be me ;)

Wendy x