Showing posts with label Crochet. Show all posts

Sunday, 7 February 2016

Crochet It - Stained Glass Blanket

Hello, I hope 2016 is being kind to you!
Today I want to introduce you to my first finished project of 2016, it's been a long time in the making so I am very, very glad that I can finally call it finished!

~ Stained Glass Granny Square Blanket ~
Stash Buster & UFO

I first blogged about this project back in 2013, as part of my UFO Hall of Shame, but that's not when I started this project it was actually way back in 2011 that this project first came to life!

The Butterfly Balcony - Stained Glass Granny Square Afghan Blanket Pattern


 Pattern: None I winged it! 
Essentially 24 Granny squares joined and then bordered with rows of granny square shells 
(two double crochet stitches then a single chain - triple chain on corners) 
until the desired size is reached then a scalloped edging is added.
Ingredients:
3mm Crochet Hook
Lots of yarn in various thicknesses
Stitches Used:
Puff Stitch // Granny Square // Scalloped edge
Joining Granny Square

It began as a way for me to relax whilst living amongst the boxes shortly after moving home. There was no TV or internet access for about a month and so in the few minutes each day, after reorganising boxes, cooking dinner and falling asleep on the uncomfortable (all we had) dining chairs, I did a little crochet!

The Butterfly Balcony - Stained Glass Granny Square Afghan Blanket Pattern

Now you might not notice it from the finished object, as it is a little different, but my inspiration actually came from, one of my favourite TV shows, The Big Bang Theory. Amy Farrah Fowler has a lovely Granny Square afghan on her couch which is all edged in black and it seemed like the most suitable project for using all the granny squares I had made!

Sonja Flemming/CBS ©2012 CBS Broadcasting, Inc.
( Image Source and Pattern from the Geek Mom blog )

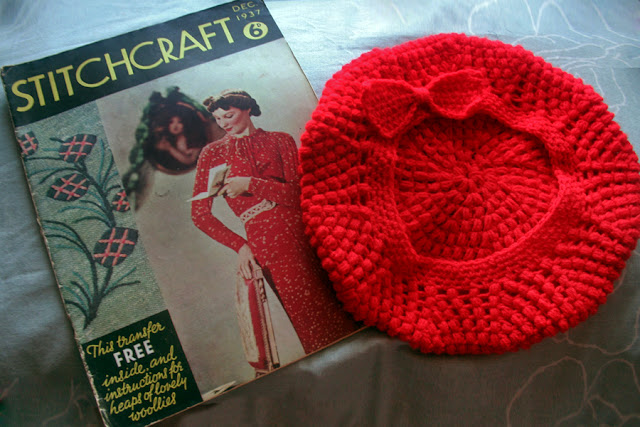
It's worth noting (probably because I didn't have the internet to hand) that rather than doing a double/treble crochet stitch shell typical of the granny square, I mistakenly did a puff stitch square instead. I can only think to blame muscle memory, as the last thing I had turned out with a crochet hook was my puff stitch beret so my hands just naturally resorted back to this stitch! My mistake was realised only once I began joining the squares together, and though it's not a massive problem the reason a  puff stitch suits beret making is the fact it creates a slightly domed rather than a flat fabric and so my little granny squares have created more of a lumpy (or as I have been referring to it nippily) fabric than I had desired, but heck it's just as cozy!

The Butterfly Balcony - Stained Glass Granny Square Afghan Blanket Pattern

After crocheting 24 squares I got a bit bored and so decided to just get cracking and start joining them together (which I did 2 New Years Eves ago). I then to make the blanket a more useful size I decided to encompass the squares with rows of double crochet, mostly using black but occasionally adding a couple of rows of one of the colourful yarns from the centre, I think it's worked out quite well it's certainly striking and the border thankfully has certainly helped to flatten down the puffy squares a little.

The Butterfly Balcony - Stained Glass Granny Square Afghan Blanket Pattern

And that was how it was left for 2 more years (I don't like to rush anything!). It was only on New Years day, this year that I finally added my last few rows of black to the border and then added the pink scalloped edging, which is something my mum showed me how to do and I must say finally makes me feel like I might have a hope of getting better at this crochet malarkey!

The Butterfly Balcony - Stained Glass Granny Square Afghan Blanket Pattern

Now it's finally finished I am rather in love with it, I just adore how striking it is it and it's certainly helped brighten up a rather dull beige sofa! In hindsight I wish I had made it just a little bigger, so that I could swathe myself in it on chilly evenings, but it fits the sofa nicely and keeps my knees warm while watching TV and plotting my next project, and lets face it seeing as it's taken me five years to get this far I think I should count my blessings that it even covers my knees!

Wendy x

Friday, 1 February 2013

The Link of Love

Afternoon! I thought it was about time I stopped by and said Hello. I have been very busy this month working away at lots of interesting projects for the coming year, scheduling lots of lovely free vintage patterns for 'The Vintage Pattern Files' and doing lots of home reorganising, in the hopes that I will be able to make 2013 a slightly more organised year than 2012. Fingers Crossed!

So seeing as I have had a bit of a hiatus from blog reading (and writing) and seeing that I am now the proud (though sweary) owner of a shiny new windows 8 laptop (reason for swearing; Apps crashing and 'One-finger swipe' thing are annoying me no end....Grrrr. What is worse is that it was a lovely belated Birthday/Christmas present, so I feel rather guilty about grumbling so much) I have finally had some time to read lots, and lots of well overdue post, I thought I would be nice to share with you a little of the lovely stuff I have seen over the last few days!*
  • I linked up to this pattern over at my other blog at Christmas but it's so good it deserves another shout! The lovely Melanie of The Folly Bird has posted a pattern of 1940s War-Time Crochet Jewelry - I will have to get my Mum on the case with these as I couldn't crochet anything that delicate! 
  • I love my woolen skirts, especially at this time of year, but they can be expensive to have cleaned. Mim from Crinoline Robot has the answer with her post on  How to Wash a Wool Skirt Its definitely going to save you the pennies! 
{source}
  • Not sure which lovely blogger led me to this site, but I am in totally in love with the gorgeous prints of Edward Dulac seen above!
  • Cassie is a supremely talented Artist, Teacher and Crafter and her latest creation "Put A Bird on It" cardigan is too cute for words. Who would have though needle felting could be so wonderful! 
  • Something I mentioned in my Dad's pullover post and is worth repeating is that you can block acrylic knitting! Yep, it's done slightly differently, but it certainly can and should be done, see Beadknitters post all about it Here
  • "Love to look neat as a pin? Like to comb your hair after you put on your dress?" Then this Apron Smock pattern that Anna from A Few Threads Loose gave away to mark 2013, its perfect for you!
  • Speaking of free stuff did you see the wonderful knitting pattern that the lovely Lucy posted after Christmas Knit Yourself a 1940's Turban. It's the pattern that she used to make the one I am modeling above. Honestly its so lovely it's been on my head daily keeping my ears lovely and warm and hiding many a bad hair day!
  • Is it just me, or have you ever wondered how people put those short links rather than the full www address, in the comments box?  Well, wonder no longer as Rebecca from The Bexter explains how to do it here!
{Source - Source}
  • Those of you that have been around here for a while will know I love a post full of screenshots dripping with fabulous vintage outfits (another film fashions post is already in the production line). So when the stylish Hannah of Leopard and Lipstick posted her screenshots of Flowers of War I was certainly not disappointed and have another film to add to my must watch list.
  • Speaking of beautiful stylish ladies May Loh's stunning series on the wonders of QiPao is just a treat for the eyes!
  • I have been using this for a while now but it time I shared I love Pilxr-o-matic for vintage-o-fying my pictures. It's downloadable so can be used without the internet and best of all its free!
And as a link up post in my eyes would not be complete without some kind of cakey goodness ...

So there you go just some of my favourite creative posts from the last few months. If you like this kind of post and want more suggestions then I can heartily recommend reading Elise's Faff Favorites. I have spent many an hour clicking on their suggestions and found some amazing things in the process!

Have a great weekend!
Wendy x

*Oooh, too many brackets! Honestly, the number of times I have thought I should rename this Blog 'My life in Parentheses (Blogging in Brackets); or some such similar thing. With this paragraph being the worst offender yet. Sorry!

Wednesday, 10 October 2012

Knit It - A Parliament of Sleepy Owls

No, I have not gone all political on you with a comment on the state of our current government (though it would be apt) it is, in fact, my latest finished knitting project - Parliament is the collective term for a group of Owls, odd isn't it. I suppose it refers to the wisdom both 'creatures' are supposed to possess!

With today's project complete, it means I have gifts for Christmas ready in October! 
I confess to feeling a little smug at the moment, as this is unheard of and seriously out of character. So to mark this achievement (although it's a day late) I am linking up to Lakota's Tada! Tuesday. Have you signed up for her Christmas swap yet? Click the link on the side bar. Don't be shy it's honestly a lot of fun and you'll have the perfect excuse for even more charity shop rummaging!

Never fear I won't be wallowing in my achievement for too long, as I have recently committed myself to knitting my Dad a Fair Isle Pullover, from Tupneys pattern, oh and did I mention I haaaate knitting Fair Isle, one way or another I'm sure there will be plenty of last minute present related stress to enjoy!
Anyway back to the owls!

~ Sleepy Owl Cushions ~


Designed By: Knitting Pony
Free Pattern Here: Sleepy Owl Cushion
Ingredients:
  • Chunky or Bulky Yarn
  • 6.5mm Knitting Needles 
  • Contrast Yarn Embroidery (eyes and beak)
  • 4ply yarn Various colours (Feathers)
  • 3.5mm crochet hook (Feathers)
  • Stuffing
  • Yarn needle
Youtube-ular Know How:
* If you can get this technique down, you will never use a chained circle to start your project again! This is so much easier especially for beginners, as you can make the required stitches in lots of space and then pull it all together nice and neat at the end. Marvelous!

I saw this tutorial over at Knitting Pony's blog last year, I knew as soon as I could find the right yarn I would have to make one for each of my friends little ones. I feel like I say this every post but, these are really easy to make! They are knitted on big needles with chunky wool, so knit up really quick which makes it almost feels like cheating!


For my owls I used 3 balls of  James C Brett Marble Chunky in brown 16, which I think has worked really well and it's lovely and soft, and definitely huggable! I went down a size on the needles to 6mm as the stitches were a bit too loose, looking at them now they are finished I could easily have gone down another size as you can still see the stuffing in places.

As I had 7 children (2 families with 3 Children, and 1 family with 1 child) to knit an owl for, I decided so as there was a bit of variety I would do one normal size (34st), one medium size (29sts), and one small size (24sts), to match the children’s ages biggest for the oldest child etc.


Rather than using just 4ply, I chose to use the chunky wool for the majority of the crocheted owl feathers. I made the smaller feathers simply by doing fewer rows/rounds, which I think worked quite well. I found the hardest bit of the whole process was stitching in the face, I ended up by couching the thread as all my other attempts came out rather wonky.


So from 3 balls of yarn I have knitted 3 large, 2 medium and 2 small owls, including feathers which is not bad going especially as I even have some left over perhaps for a small owl for me! Though I think I'd better put all thoughts of that aside for now and get cracking on that Fair Isle pullover!

Wendy x

Saturday, 7 May 2011

Giveaway Time - The 1930's

Hello, dear followers! 

I'd like to start by saying a big old 'Thank You' to all that have left lovely comments on my blog recently, thank you for taking the time I really am grateful to you all :) You may remember that a while back I promised you all a giveaway, for sticking with me! It has as usual taken a bit longer than I hoped to post about it, this is due to me deciding to make one of the prizes myself. You will be glad to know the wait is finally over, so now without further ado, here is what you could win in 'The 1930's giveaway'...

Get the 30's look, with inspirations from Stitchcraft and a Vintage, styled crochet beret to Adorne your Barnet!
1. An original copy of December 1937 Stitchcraft Magazine (from my collection)
Sadly it is missing its free transfer, but as it is over 70 years old, I guess it's understandable!

I have collected a few Stitchcraft Magazines over the years and I love them all, but must confess that the ones from the 1930's are my favourite. They really capture the end of an era just before the world was about to change forever. They are packed full of vintage inspirations, lots of knitting patterns, gloriously stylish adverts and lovely homely recipes. It really doesn't matter if you can't knit, as it's just as much fun to gaze at all the vintage pictures and adverts and get a snapshot of the era!

What you'll find inside this issue ...
More fabulous Knitting Patterns including the knitted dress on the cover!
Knitting Paters Galore: A sporting set for Him and Her, a toddlers dress, and ladies cardigan.
A few homely makes including some Christmas time recipes (not very summery I know!!)

2. A 1930's style Puff stitch Beret in a vibrant cherry red, made from the same pattern as this and lovingly (slowly) crocheted by yours truly! Oh but don't let that put you off :)


A Puff Stitch Beret for unleashing your inner 30's starlet or perhaps for a sojourn in the French Resistance. Oh and I'm really not as miserable as I look, Promise!
So there you have it what do you think?  Is it something you would like to get your mitts on?
If so then here is what you need to do:

1. Be a follower of the blog.
2. Leave me a little comment below.
 It's that Simple!

I will post this giveaway prize to anywhere in the world so please feel free to join in! This contest will be open until 31st of May 2011. After that one winner will be chosen at random. I will then post the winners name on the blog and it will be up to the winner to get in contact with me to receive their prize!

Good Luck!
Wendy x

Wednesday, 8 September 2010

Crochet It - Vintage Style Bow Beret

A little while ago I came across a beautiful beret pattern on Ravelry. It is for a vintage style beret with cute little bow on the side which looks very 'Chic!' and best of all the pattern is FREE!

~ Puff Stitch Crochet Beret With Bow ~
(Stash Buster)

The pattern is from creative yarn a very talented Italian girl who creates, her own beautiful crochet and knitting patterns, many of which are available for free on her blog!

The Butterfly Balcony - Puff Stitch Crochet Beret With Bow Free Pattern

Created by
Ingredients: 
50g DK wool
 4mm Crochet hook

Now I am truly hopeless at crochet, my poor mum has tried in vain to teach me many times to no avail. But as I loved this pattern so much, I decided I would give it a go and employ the power of  YouTube and Google to help me muddle through.

In case any of you also need a little help with crochet too, here are the stitches and how to do them.
It all went a little WoBbLy!!!


Ch - Chain 

Yo -   Wrap yarn around the hook.

Ps -   Puff Stitch (see video)

Hdc - Half double crochet (see video

2Ptog - Puff stitch decrease - *Yo, insert hook into lower stitch, draw up long lp* 3times, Yo and draw through 6 of the loops (this will leave one stitch on the hook and the drawn through yarn), *Yo, insert hook into lower stitch, draw up long lp* 3 times, yo then draw yarn through all loops on hook, ch1. 


Things I learned 
  • Each puff stitch is made in the top of the puff stitch in the row below not in the chain between (oops!)
  •  It may look a little wobbly whilst you're working the increase rows (see above picture), but don't panic, this should sort itself out once it's finished!
  •  I have absolutely no idea how to get the correct tension in crochet!
From reading some of the comments on Ravelry it seems that many people found that their attempt differed from the original pattern, as did mine but they all look great and individual none the less! And with it having 184 different projects to date, it is one well tried and tested pattern.

The Butterfly Balcony - Puff Stitch Crochet Beret With Bow Free Pattern
The back


For my attempt, I had to deviate from the pattern a little as when I got to round 16 it was still way too big! so I added two more rounds of decreasing rows to pull it in a bit more :

Round 15: Work 1Ps in same st as joining and 1 Ps in next 2 st, 2Pstog, *1 Ps in next 3 st, 2Pstog.* around, join.
Round 15a: Work 1Ps in same st as joining and 1 Ps in next st, 2Pstog, *1 Ps in next 2 st, 2Pstog.* around, join.
Round 15b: Work 1Ps in same st as joining, 2Pstog, *1 Ps in next st, 2Pstog.* around, join.

Also, I wrapped the wool around the bow rather than doing the crochet band as my bow came out way bigger than (I think) it was supposed to, so the crocheted band was not really working!


The derpy close-up
I am really pleased with how it turned out, I can't wait to wear it out and about, it's not perfect but I am still proud of my first attempt at proper crochet and I am well and truly hooked! 
Wendy x