Sunday 27 December 2015

Knit It - The Perfect Christmas Jumper

I hope you all are having a very Merry Christmas if you celebrate it, and if you don't I hope you have at least had a lovely rest!!!

I have been at my parents home in Liverpool for the last few days where I've come to realise, my favourite part of Christmas is actually the days in between Christmas day and New Years Eve. If your lucky enough not to have to work, they are the least pressure filled and most relaxing of any time of the year, perfect for self-indulgent crafting whilst watching films you've loved since childhood, feasting on leftovers turned into ingenious meals, and spending time with the ones you love, it's bliss!

The Butterfly Balcony - Christmas Tree Decorations

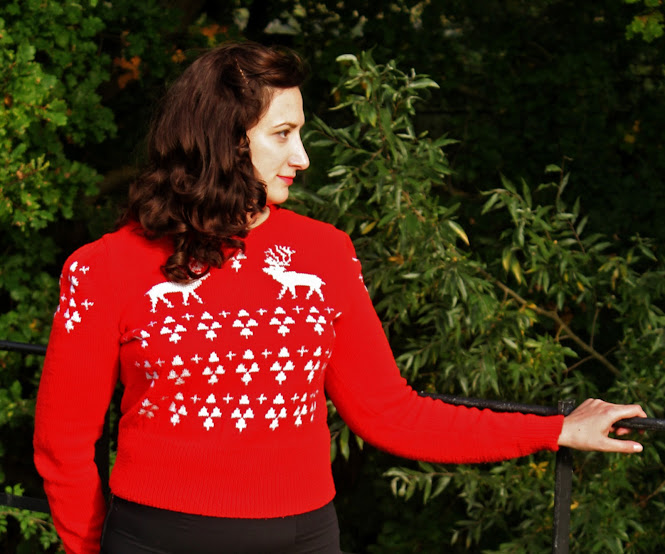
This year I decided against making myself a Christmas outfit for the big day, as to be honest I already have lots of dresses which seldom get an outing, it seemed extravagant to add another one to the collection. Plus after the trouble I had with last years dress (I'll actually be blogging about that soon, better late than never I guess!) I didn't much feel like another battle, so instead of showing off something wonderful and new I am going to give you a better look at a stalwart of many Christmases now, my 'Perfect Christmas Jumper'.
~ Perfect Christmas Jumper ~
Pattern By
Yarn:
5 100g Balls Robin 4ply Red
1 100g Ball James C. Brett Supersoft Baby Shimmer White

The pattern is another of Susan Crawford's wonderful takes on an original vintage pattern, Susan takes such care over resizing and updating them, that you can always be sure the fit and finish will be as true to the original pattern as possible, and this is no exception, the lovely puff sleeves and colour work, really make this pattern a 1940s classic.

The Perfect Christmas Jumper Knitting Pattern Susan Crawford

I first blogged about this jumper back in January 2011, I'd endeavoured to finish knitting it by Christmas a few weeks earlier but managed to miss that by just one month! It was the first time that I had knitted anything with Fair Isle and Intarsia so I found it a bit of a struggle, but once it was done it was certainly worth all of the tangled messes I got myself into, as it's been worn every Christmas since!

It was also the fist time I'd knitted long full-length sleeves, which I remember at the time being never ending. I am so glad now that I persevered as they are lovely and long and just the perfect length, something which I have struggled to achieve since, I think my eagerness to get wearing my latest project can make me a little optimistic on how much I have actually knitted and so the sleeves tend to come up a little on the short side (I am talking about you, Date Maker).

The Perfect Christmas Jumper Knitting Pattern Susan Crawford - Back View
The one drawback with this jumper is my choice of yarn. I didn't much care for it at the time but it was a cheap acrylic option when there were very few cheap options available (it's amazing how much more choice we have in 4py yarns a mere five years later!) so it was purely a practical choice, though I do wish I had invested a little more money into it, as the squeaky feel of the fabric has not improved with multiple washes and fabric conditioning, and the colour in real life is a little more brassy than I would have chosen in hindsight, but I still love it and it's certainly striking!

The Perfect Christmas Jumper Knitting Pattern Susan Crawford

There is one other side effect of this cheap yarn, and perhaps my loose style of knitting, which is the jumper seems to grow a little with each wash. Potentially this could be a problem, however as I only wear it a few times a year it only needs a little washing, and as I have put on a little more weight over the years since I first made it, it has actually grown with me and so has been more of a benefit rather than a problem.

The Butterfly Balcony - The Perfect Christmas Jumper 1940's


I am actually tempted to knit this up again, in perhaps a just as festive green and white colourway but considering how slowly I knit, though I am getting a little better, I should heed my advice from my last post about this jumper and probably start knitting soon!

 Wendy x

Wednesday 9 December 2015

Butterfly Balcony Boutique - Christmas Edition

It's been awhile since I posted about my little Etsy shop, mostly this is because I have let it fall by the wayside a little due to all the things I've had going on this year, but now it's time to give you a little look at some of the lovely things (mostly handcrafted by my mum) that I have been listing lately!

Click on the links to see more pictures
£13.00 + Free UK Shipping

First, are these adorable, Scandinavian style felt birds, perfect for adorning your tree this Christmas!


£59.00 + Free UK Shipping
My mum loves making quilts she spends many hours coming up with new designs and stitching away to see her ideas come to life and this and this gorgeous calendar quilt is no exception!


This quilt has twelve a unique appliquéd teddy bears one for every month of the year! From snowy January, through the heat of August, to the crisp fireworks of November all the way up to the festive cheer of December. Each bear is tucked up nice and cozy in their little beds with blankets which reflect the passing months.


£5.00 each + Free UK Shipping

My mum has an enviable fabric stash with fabrics from many, many years of sewing and these cute little Scottie Dog brooches are handmade from many of the vintage fabrics found lurking there!


Each pup is handmade from vintage fabric, gently stuffed with polyester fiber filling to give them shape, adorned with a dashing collar secured with a button. They love long walks and are the perfect size for attaching to your coat or jacket so why not take one out for a stroll!
£4.00 per pair / 3 pairs for £10.00 + Fee UK Shipping

And now for something I made myself! 


These pretty little rose cabochon earrings available in six pretty shades and are certain to add a touch of spring to any grey day!


There is also a small selection of vintage clothing, all of which I would be keeping if I could just squeeze myself into it!


Free Shipping on all UK orders
For international orders I have charged what I think the cost will be, I will however once a delivery price has been obtained to your country, always refund any over payments!

Wendy x

Wednesday 2 December 2015

Free Patterns - 1943 Needlework Illustrated

Hello!
Today is my birthday and so I thought, seeing that I am getting lots of treats today it might be nice to treat you lovely readers as well!! So I am sharing one of my Needlework Illustrated booklets which contains lots of sewing ideas for making yourself and your home look fabulous during rationing, also most importantly four super knitting patterns!

The Butterfly Balcony 1943 Needlework Illustrated Zebra Striped Shirt Free Knitting Pattern


Zebra Striped Shirt
To fit a 32-36" bust
The striped Shirt on the cover of this Magazine is a cleverly knitted version of one of the most popular and charming fashions of the day. These blouses always look fresh and tailored, are attractive under a suit and important enough to wear with an odd skirt for everyday occasions.

The Butterfly Balcony 1943 Needlework Illustrated September Beauty Free Knitting Pattern
September Beauty - Lace Knit Jumper
To fit 32-36" Bust
These days every garment has to do the work of two. Here is a versatile little knitted that makes the prettiest lace-stitch jumper you could wish for, or buttoning all way down the front, can be worn as a cardigan when so needed. The full sleeves are a new and charming feature finishing in deep ribbed cuffs to match the ribbed welt that fits so snugly at the waist. A tiny ribbed border edges the neck and fronts.

The Butterfly Balcony 1943 Needlework Illustrated Classic Cardigan Free Knitting Pattern

Classic Cardigan - Selected for Style
To fit 33-35" Bust
How's this for a bonny baby! The foal, full of fun and frisk, is only three days old! The Proud owner is wearing the classic hand-knit Cardigan. Four coupons were never invested better than in this warm woolly cardigan. It takes 8 ounces of 3 ply wool and is worked in stocking stitch!

The Butterfly Balcony 1943 Needlework Illustrated Arab Stripe Free Knitting Pattern
Arab Stripes Jumper
To fit 32-34" Bust
Raid your 'muddle-box' for bright bits of mercerised thread or wool left over from your knitting, and work them into the bands of colour that distinguish the sleeves of this novel jumper. Here you have a "Knitted" of great individuality... smart, new and striking... yet so easily achieved.


I hope you enjoy!
Wendy x

Sunday 22 November 2015

Giveaway - Knit Vintage

I mentioned in my recent review of Knit Vintage that I had accidentally ended up with two copies of this pretty little book, one had been an impulse buy from me a few weeks before my birthday and by chance, the other was a birthday present from my parents, at least they know what I like! So seeing as I really don't need two copies I have decided to give one away to you lovely readers as an early Christmas gift!

If you missed my review of Knit Vintage then it's worth hopping back to have a look to see all the lovely patterns you could be winning!


All you have to do is leave a comment below (needn't be anything fancy just a count me in will do!) by 30th of November for your chance to win!

I will post anywhere in the world, so feel free to take part!

I will draw one name at random on Tuesday 1st December and I will publish the winners name here!

Oh, I know some of you are having issues with the Disqus comment form, so if you are having problems leaving comments on this post then just drop me a count me in email instead to butterflybalcony@gmail.com and I'll add your entry to the list!

Good luck!
Wendy x

Ok so after using random number generator thingy, it's given me the number...
Seven which if I work from oldest to newest means the winner is Kate-Em!

Wednesday 18 November 2015

Read It - Knit Vintage

As we are creeping ever closer to Christmas I thought it might be a good idea to publish a few of the book reviews I have been working on, to perhaps give you a better idea of things to ask Santa for, or perhaps not to ask Santa for! So today I am going to to have a good old look at Knit Vintage, a book which I accidentally have two copies of, one I got one for my birthday last year from my parents, and the other was bought as a treat to myself a few weeks earlier, whoops!

Knit Vintage ~
Also printed as 'Sweater Girls' in the US
By Madeline Weston and Rita Taylor
Published by Jacqui Small Publishing 2012
RRP £20.00

'Knit Vintage offers a fantastic selection of more than 20 timeless designs based on original women’s knitwear patterns from the 1930s to the 1950s.  Drawing from their own extensive collections of vintage knitting patterns, authors Madeline Weston and Rita Taylor have chosen garments for their classic style and updated them to appeal to 21st century tastes. The patterns, which incorporate traditional stitch formations such as cables, lace, Fair Isle and other motifs, have been adapted to suit an array of gorgeous modern yarns in fashion-forward colours and sumptuous textures, including merino, angora, cotton, bamboo, cashmere, alpaca and silk. All feature classic touches that will appeal to anyone who loves the exquisite attention to detail found in vintage knitwear. Beautifully styled and photographed, this bespoke collection of 20 projects will delight every knitter and fashionista who appreciates the classic elegance of the original sweater girls and the retro silhouettes of the silver-screen starlets.' (Quote: Jacqui Small LLP)

Sunday 25 October 2015

The Kitchen Front - Sloe Gin

Last year I was given a small bottle of Sloe Gin by a neighbour, not being much of drinker I had never tried it before and I'll be honest I didn't think I would like it much but I was wrong (I'm always disappointed that red wine doesn't taste more like blackcurrant cordial, but then I am from the Alcopop era!), it was really quite delicious if a little on the strong side! So being a lover of all things homemade I knew it was definitely something I would like to try myself, well, once I had located a blackthorn hoard that is!

How To Make Sloe Gin - Last year I was given a small bottle of Sloe Gin by a neighbour, not being much of drinker I had never tried it before and it was really quite delicious if a little on the strong side! So being a lover of all things home made I knew it was definitely something I would like to try myself, well, once I had located a blackthorn hoard that is!

Luckily for me after taking a short cut back from my allotment a few weeks back I spotted a wealth of little purple berries on the bushes that lined the path, to be honest it took me a moment to realise what they were, but after a quick Google to check that the leaf shape resembled those of the blackthorn and not some hideously poisonous cousin (I don't know if there is one but it's always best to check! They are actually related to plums, and have quite a lot of fascinating folklore and history attached to them, though good lord, do not attempt to eat one, mergh!) I decided to pop back and pick some.

How To Make Sloe Gin - Last year I was given a small bottle of Sloe Gin by a neighbour, not being much of drinker I had never tried it before and it was really quite delicious if a little on the strong side! So being a lover of all things home made I knew it was definitely something I would like to try myself, well, once I had located a blackthorn hoard that is!

There are all sorts of advice on when to pick sloes, late August, early October, late October, even December, when the berries are more black than blue, when the berries are very squishy, when some of the berries on the bush are shrivelled, but the most common advice was to pick after the first frosts of Autumn as this helps the sour little berry to release its flavour into the gin. Overwhelmed by this wealth of opinions I chose to pick mine in late August a few days after my sighting, as the bushes were abundant and the berries had developed their dark blue bloomed hue and looked ripe to me, Whether this was too early, well I will just have to wait and see, but as the advice is as varied as it is long I decide to take a chance!

How To Make Sloe Gin - Last year I was given a small bottle of Sloe Gin by a neighbour, not being much of drinker I had never tried it before and it was really quite delicious if a little on the strong side! So being a lover of all things home made I knew it was definitely something I would like to try myself, well, once I had located a blackthorn hoard that is!

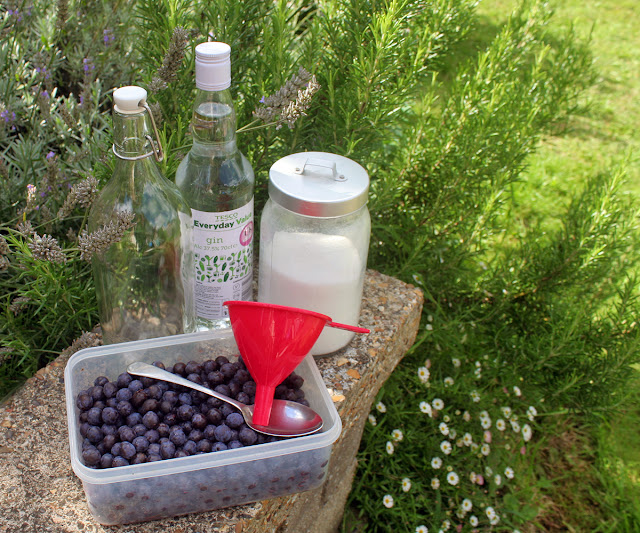
Berries picked, it was now time to choose a recipe. Here again, I came across a multitude of different opinions on how to create the perfect tipple. Some recipes require precise measurement of ingredients and others don't, many recipes suggest adding lots of sugar at the start and others add it towards the end, some insist you get the best Sloe Gin by starting with an expensive gin and others swear by a cheap one. In the end, I settled for the most simplistic recipe I could find and some cheap and cheerful Tesco's gin.

~ Sloe Gin ~

How To Make Sloe Gin - Last year I was given a small bottle of Sloe Gin by a neighbour, not being much of drinker I had never tried it before and it was really quite delicious if a little on the strong side! So being a lover of all things home made I knew it was definitely something I would like to try myself, well, once I had located a blackthorn hoard that is!
Ingredients:
1 bottle of Gin
1 lb of Sloes approx  
If you can't find a blackthorn bush then you could buy some berries from those that can here
Sterilised bottle or jar which is airtight - mine was from Ikea
2 large Spoonfuls of Sugar
A funnel for pouring the Gin & Sugar

Once you have picked your sloes give them a quick check over for maggots and stalks, then pop them in the freezer for 24 hrs. or overnight, this will mimic the first frost of Autumn and start to break down the flesh.

How To Make Sloe Gin - Last year I was given a small bottle of Sloe Gin by a neighbour, not being much of drinker I had never tried it before and it was really quite delicious if a little on the strong side! So being a lover of all things home made I knew it was definitely something I would like to try myself, well, once I had located a blackthorn hoard that is!

When ready to make your gin take your berries out of the freezer and let them defrost before bottling. Your berries should have started to break up a little but if not (like mine) you can either bash them with a culinary mallet or rolling pin, or the most traditional way would be to pierce the berries with a silver needle or a thorn from the bush you picked them from, I used a sewing pin as it was what I had to hand and sat out in the sunshine I found it to be quite a relaxing activity!


Fill your sterilised jar or bottle halfway up with pierced berries and then pour over your gin, leave a little air gap for now, and add in your 2 spoons of sugar - Adding a small amount of sugar at this stage is the easiest way to tailor the sweetness of your gin to your preference, it is difficult to judge how sweet it will become before it has matured and so it is easier to add more sugar later on in the process.

How To Make Sloe Gin - Last year I was given a small bottle of Sloe Gin by a neighbour, not being much of drinker I had never tried it before and it was really quite delicious if a little on the strong side! So being a lover of all things home made I knew it was definitely something I would like to try myself, well, once I had located a blackthorn hoard that is!
Seal your container and give it a good shake until the sugar starts to dissolve into the liquid then top up with any remaining gin and give a final shake before storing on its side in a cool dark place turning every few days.

How To Make Sloe Gin - Last year I was given a small bottle of Sloe Gin by a neighbour, not being much of drinker I had never tried it before and it was really quite delicious if a little on the strong side! So being a lover of all things home made I knew it was definitely something I would like to try myself, well, once I had located a blackthorn hoard that is!

Now for the difficult bit, waiting to sample it! 

For best results (every recipe agreed on this point) it needs to be left to macerate for at least two months to give those little berries a chance to release all their yummy flavour into the gin. As I have chosen the method which only adds a little sugar at the start I will need to add more to taste in a month or two, this can be done by making up a sugar syrup - mix equal amounts of sugar and water dissolved over a low heat, leave to cool and then add the syrup into your gin and then reseal for a few more days. It has been a few weeks since I bottled mine and the colour is slowly getting richer so if all goes to plan it should be ready for a colourful Christmas tipple!

Have you ever made sloe gin and do you have any tips?

Wendy x

Friday 23 October 2015

Knit It - The Date Maker

Hello, it's been a while, hasn't it! Goodness this year seems to have gone by in a whirl and I am still spinning from all the wonderful things that have happened, so much so that I have been struggling to know where to start with getting this little blog up to date and rather than procrastinate any further I've decided I am going to show off my recently finished knit, after a quick preamble to set the scene that is, by now you'd expect nothing less!

A few weekends ago it was the annual IWM Duxford air show, I thoroughly enjoyed last years event despite a very early start, so I knew that I would have just as much fun this year, weather permitting, so ordered some tickets and popped along!


I was not disappointed, the weather turned out to be utterly perfect and the show was just spectacular! As it was the 75th Anniversary celebrations of the Battle of Britain there were lots of warbirds in flight and lots and lots of Spitfires (I do love a Spit). I won't overwhelmed you all with all my pictures here, but there are many more over on Flickr if that takes your fancy!

I'd decided if the weather was going to be anything like it had been for most of the summer (read: cold and windy) then I was going to need a good cardigan to keep the chills at bay. So I searched The Vintage Pattern Files for some inspiration (about time I used it myself!) My criteria was simple it needed to be 1940s in style and relatively quick to knit, as I only had about three weeks until the show. After a little searching, I found the perfect pattern, one that has actually been nearing the top of my knit list for ages, it was finally time to make a date with The Date Maker!

~ Date Maker Sports Jacket ~
Columbia Style Book 1946
Free Pattern: 
Size: 
38-40" Bust
Yarn: 
Needles:
US size 7 / 4.5mm

Wendy at Duxford Airshow 2015 wearing her newly finished Date Maker jacket


So I had my pattern, but there was just the small matter of re-sizing to contend with. The pattern is designed for a 32-34" bust so I was going to need some major up scaling for it to fit my 38-40" measurement. I had a quick look on Ravelry to see if anyone had any advice for resizing but found nothing, so I settled back and knitted many, many, many tension squares on various different sized needles and yarns. It was totally worth the effort, as after all my testing I discovered that because my knitting style is loose I could use an Aran weight yarn and the recommended 5mm needles, and get the extra inches I needed for it to comfortably fit me without having to change anything else!

1940's Date Maker Sports Jacket Columbia Style Book 1946 Free Pattern

When choosing a colour I just knew it had to be red, no indecision there, so I ordered some really lovely Stylecraft Cardinal yarn from Wool Warehouse and waited impatiently for it to arrive. Luckily it turned up on the Friday just before the summer bank holiday, which meant I was able to make the most of the extra time off I had and devote it to knitting! That extra time and the fact that this is a super quick pattern to knit meant that it only took me 3 weeks (22 days to be exact!) to knit, block and sew together, for me (a slow knitter) that really is a record!

1940's Date Maker Sports Jacket Columbia Style Book 1946 Free Pattern
The pattern is very simple to create and after a few repeats very easy to remember. Essentially it's a rib pattern, which is staggered either side of the centre 2 stitches, which creates the wonderful diagonal lines which make this jacket so appealing! The first row is where you stagger your three knit and purl stitches in the direction you want the diagonal to go. The second row is what I call a confirmation row, it's where you knit all the purl stitches and purl all the knit stitches, essentially using the row below as a guide, which is great as it gives you a chance to rest your mind for a bit!

1940's Date Maker Sports Jacket Columbia Style Book 1946 Free Pattern

After knitting all the sections, I blocked each piece to ensure that it came out to the size I needed, this worked really well, apart from Beau choosing to sleep on the back section while it was drying, meaning the ribbing got a little more flattened that I was hoping for, though I am sure after it's next washed it should spring back! Once it was all dry I knitted the cuffs and attached them to the sleeves before seaming up the sides. I have to say the sleeves are my favourite part of this pattern, I love how they look with the V's running up them, that said I still have a dislike of knitting sleeves which can be felt by the fact I could have knitted them a smidgen and a half longer (probably 2" if I am honest) as they are just on the edge of being long enough for my gangly limbs!

1940's Date Maker Sports Jacket Columbia Style Book 1946 Free Pattern

After joining all the body sections together it was time to crochet around the neckline. I have to say I found this the most tricky bit of the whole process, as no matter how hard I tried I could not stop the points of the neckline curling up, I figure it's designed to be worn with a collared blouse so I am not too worried about it, though it is irritating!

1940's Date Maker Sports Jacket Columbia Style Book 1946 Free Pattern

Next was knitting the waistband. I started by knitting to the measurements of the lower edge of the jacket, adding a few extra inches for the buckle flap, but once I tried the jacket on realised my error, it was just too baggy and the buckle was not going to be able to cinch the waist in at all. So reluctantly I unpicked the band and re-attached it, this time, stretching it against the lower edge as I stitched so that it would give pull in a little more and give the jacket more of a blouse effect which would fit my body more snugly!

1940's Date Maker Sports Jacket Columbia Style Book 1946 Free Pattern

Last up was covering and attaching the buckle, I used this video to help me crochet over the buckle and then attached it to the lower edge of the jacket, it's only later that I realised I had sewn the waistband on the wrong way, blast, it should close right to left, not left to right, but who's going to know, well apart from me and you, and you won't tell will you!

Wendy at Duxford Airshow 2015 wearing her Date Maker Jacket

So I had finished it in time for Duxford, and there was no frantic sewing in of ends on the way there either, which is utterly unheard of! As it turned out the weather was the warmest had been all summer and so I did feel a little bit toasty, as the fabric created by all the ribbing is quite dense, but I loved wearing it so much that I persevered through the heat! I have actually worn it quite a bit since and can honestly say it's the comfiest thing I have knitted so far.

So there you have it my first finished knitted and my first blog post in simply ages, I now just need to fill you all in on all the other fun stuff that has happened while I have been away, this could take some time!

Wendy x

Tuesday 21 July 2015

Sew It - Spring For Cotton

Eek has it really been three months since my last post, blimey! Well, I had better get on with showing off my Spring for cotton project before it gets too cold to wear it!!


1940s Style Sweetheart Sundress ~
Pattern:
By Hand London's Kim Dress
+ Side Pocket Tutorial - Youtube
Fabric:
2m Custom printed medium weight cotton
1/2 meter White medium weight cotton
Size Made: 
16 UK - With Adjustments

I really enjoyed making this dress, so much so that as soon as I had finished and photographed it, I unpicked it all started again!


Okay, it wasn't actually the love of the pattern that made me do this, even I know that would be bonkers! What actually happened was, I'd finished the dress before the deadline and was super proud of myself, pats herself on back, but I was so keen to finish it that I forgot to check the fit, after my initial pinning stage, and just went full steam ahead into finishing it as soon as I could, so, lo and behold the moment I tried it on, I realised it was way too large in the bust area!

Front Bodice
I always have a bodice fitting issue with sleeveless dresses, I usually have to adjust the straps or bust somewhere along the line, as my bust is proportionally smaller than the standard pattern size for the rest of my torso, but even after the usual adjustments it was still too big; if I'd have left it as it was I would have ended up flashing my undies every time I lent forward, and that was just not the look I was hoping for. So rather than leave it as is I decided to bite the bullet and unpick it all and start from scratch!!

Adjusted bodice
I am glad I did, as I know I would have never worn it otherwise and it's too pretty not to wear. The fabric did struggle a little with all the unpicking, being a printed cotton, there were holes left in the print by the unpicked stitches but as I was taking it in they hardly show as they are mostly hidden in the seam allowance, though around the waistband the are a few rouge ones.

Back View

The pattern was a dream to sew, the most difficult part was the bodice, as there are quite a few pieces to it which give it shape without the need for darts (it's all very clever) and it's lined, that said it was not too tricky, though I seem to have puckered the back seam (see above photo back seam on the right) when under stitching and so it won't press out, I don't know how I managed it but as it's behind me I am not going to worry about it. Also, the concealed zipper has not been quite as well concealed the second time around, but I really don't mind as I rather like the contrast, so I am going to see it as a feature rather than a flaw!

Not so invisible zip and gathered waist

I managed to get the whole dress out of the 2 meters I had, which was quite a squeeze, but as the skirt was gathered I just added less to the width, which worked out rather well as it is quite a stiff fabric the skirt benefited from being a little less full. Also, the mismatching of the pattern which I mentioned in my last post doesn't really notice that much which is what I was hoping for!


I have worn it a few times over the last few months, when the weather permitted, and I have found it great comfy dress to wear, I must confess to always wearing it with a blouse (see my Instagram for the evidence) or cardie over the top, as I have a dislike of showing off my arms especially at work. Oh, I nearly forgot, I added some side seam pockets to the skirt on the second stitching, which are so simple to do and make the world of difference to how much wear it will get, as pockets are soo useful!

Okay, all that is left to do is to give you an awkward (slightly surly) picture of me wearing it, one day I promise I'll get better at having my photo taken!


Wendy x

Tuesday 21 April 2015

Spring For Cotton - My Plans

Hello I hope the week is being kind to you so far and that you all had fabulous weekends! I certainly did, I spent mine giving my flat the spring clean of its life and absolutely wearing myself out in the process! It was certainly worth it, though, as there is nothing nicer than having a gleaming house, even if it will only last a few weeks (OK, days)! As well as cleaning like a demon, I even managed to fit in a bit of work on my project for 'Spring For Cotton'.


As you might have guessed, seeing as this is the first time I have mentioned it here, I decided quite late in the game to take part. The decision was really made for me once I received my Kickstarter reward from By Hand London. Along with the gorgeous patterns and other neat stuff, I also got 2m of printed fabric which I got to design!


I knew when By Hand London announced their Kickstarter plans for fabric printing I would have to help them out, as there was a particular design that I had been dreaming of for years. The eagle eyed amongst you may have already spotted where this pattern comes from. Here is a closer look.


Well the design is a little different to the original, I have moved a few things about a little and added some more buttons & pins and changed the background colour, but essentially it's the design from the title pages of and Odhams classic from the 30s, a book many UK based vintage sewers will probably have come across.

The Pictorial Guide to Modern Home Needlecraft 1938,  is one of the first books I bought on ebay when I first figured out how to buy things on ebay, many, many years ago. Once I saw the title pages I was smitten with the design thinking it would make the most wonderful fabric, though it never occurred to me then that I should try to make it myself!


There is a little flaw in my beautiful fabric. I sized my pattern up to make a fat quarter, but sadly when printing, the pattern didn't flow, my error in my naivety at this pattern printing malarkey, so the 2m is essentially made up of slightly misaligned fat quarters, which is irritating, as it restricts the patterns I can choose, but it's not the end of the world as I can work around this to a degree and heck I like a challenge!

So with my 2m of cotton fabric in hand, next it was time to choose a pattern. Initially I though I'd make a simple 50s circle skirt, as I figured that it would hid the flaws in the pattern due to all the swishy fabric. But then the weather got really warm and I remembered how much I love the cotton sun dresses from the 1940s, especially ones with sweetheart necklines (honestly if the shops started selling dresses with sweetheart necklines and peplums I think I would never sew again!), so I went through my pattern stash to see if there was anything suitable.

This 1950's bodice pattern is available for Free Here!
Kindly shared by Miss Dixie O'Dare

Unfortunately nothing quite hit the spot, most needed some serious resizing, and with the ever increasing demands on me at the moment, I just knew I wouldn't be able to find the time to 'toile' away the hours. So I decided to go with vintage inspired rather than true vintage, and turned to one of the patterns I got in my Kickstarter reward, the Kim Dress from By Hand London.


It was only when I slid the pattern out of its outer envelope, that the second option of a dirndl skirted sweetheart neckline dress, was revealed to me! So though it is a thoroughly modern pattern (aaaah, multi-sizing) it's certainly one that has 1940s styling potential. It all seems very simple to make up so far the bodice is all but done and the simple dirndl skirt should mean that I can squeeze the whole dress out of the 2m of fabric that I have, fingers crossed!

Wendy x

Monday 6 April 2015

Read it - TGBSB: Sew Your Own Wardrobe

I love books. If anyone asks me what I want as a gift, nine times out of ten I'll point them in the direction of a book I've been lusting after, usually on Amazon. My poor billy bookcase is straining under the weight of the multitude of sewing, knitting, gardening, cookery and history books I have collected over the years.

The Butterfly Balcony Review of The Great British Sewing Bee: Sew Your Own Wardrobe
That shelf is definitely sagging under the weight of all those words.


Having such an extensive library and not a lot of space, new arrivals have to earn their place upon my shelves. When I buy a book I like to know exactly what I am getting, if it's going to contain patterns then I want to know exactly what patterns! Oddly this is not always so easy to find out, most reviews and online stores only show you snippets of what's included, a taster to whet your appetite but not necessarily inform you as to what is inside. I find this frustrating so I've decided to do a few quick reviews of some of the books I own in an effort to help those of you, who like me would rather have the full picture before making the decision to add this book to your collection!

Seeing as The Great British Sewing Bee has recently been back in the limelight it seemed only right to start with a book from the series. Unconventionally I am starting with the second book as it's the only one so far I have made something from so feel I can give you a more well-rounded account. Right, let's take a closer look!

The Great British Sewing Bee: Sew Your Own Wardrobe ~
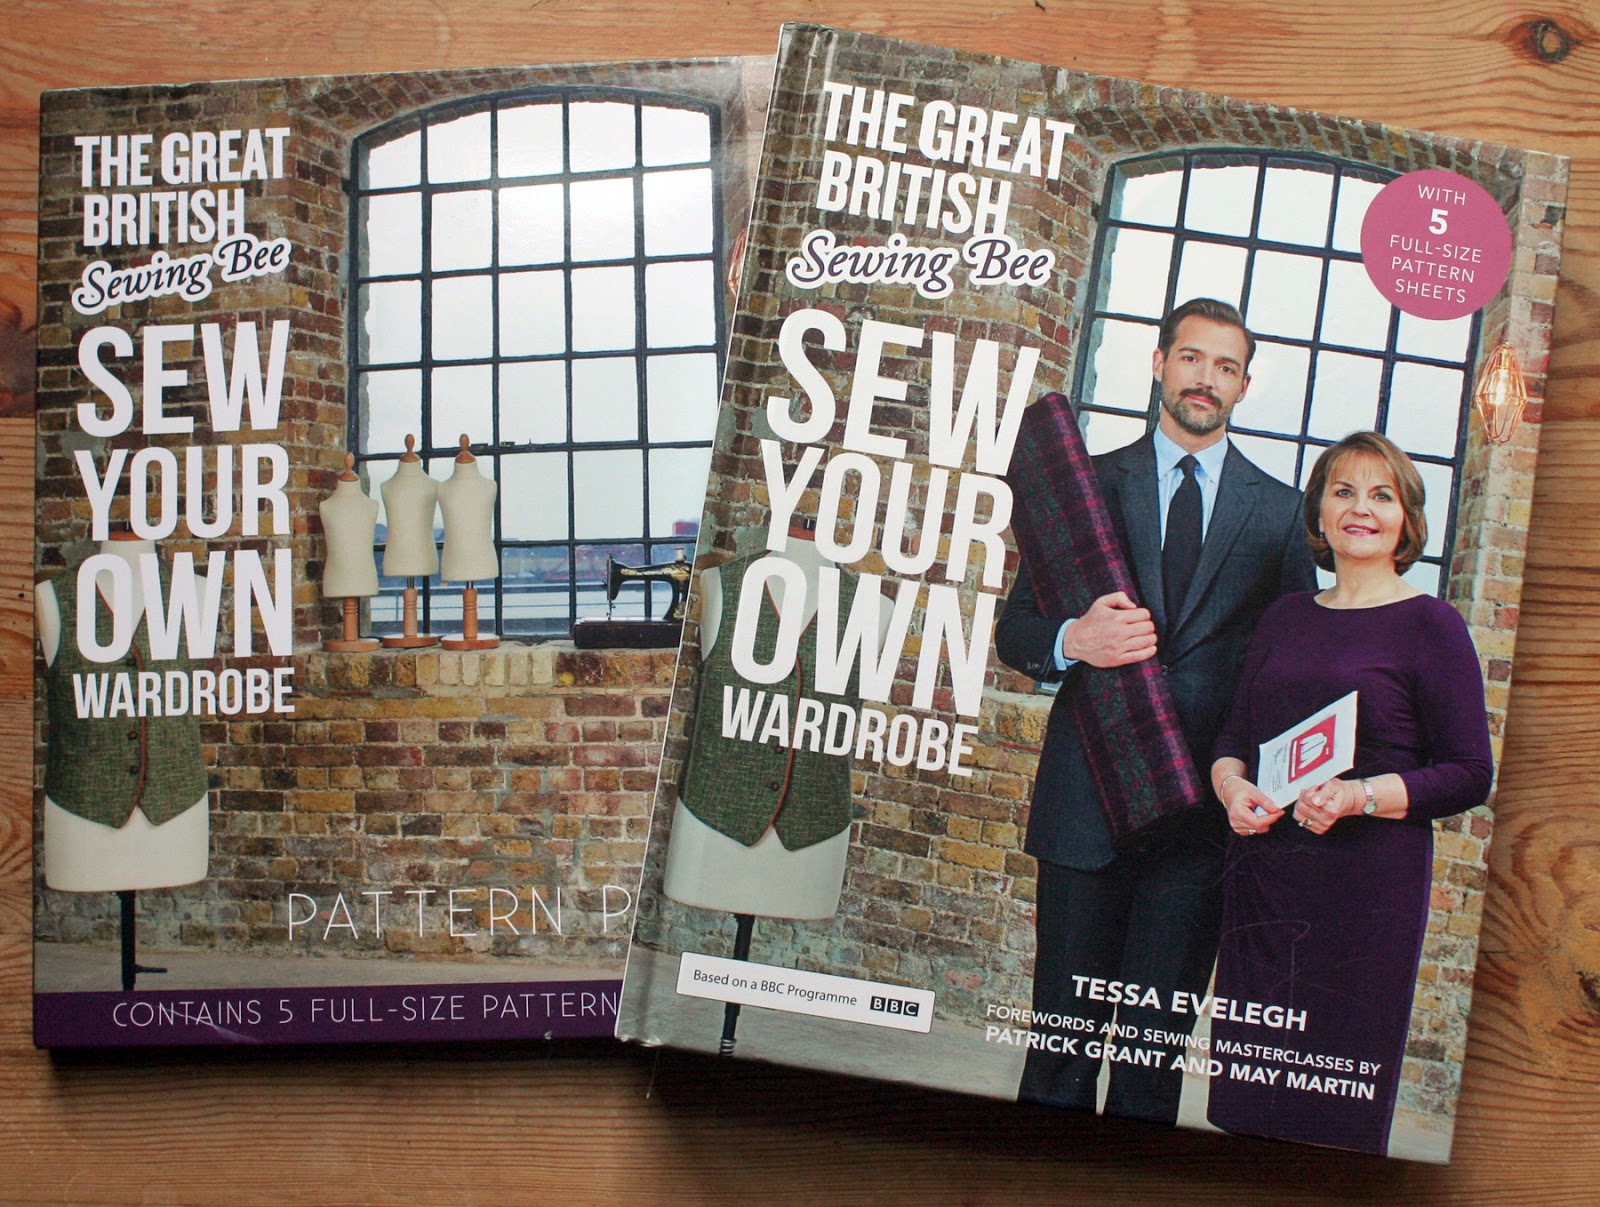
By Tessa Evelegh with Forewords By Patrick Grant & May Martin
Published by Quadrille 2014
RRP £25.00

The Butterfly Balcony Review of The Great British Sewing Bee: Sew Your Own Wardrobe

'An accompaniment to the hit BBC series presented by Claudia Winkleman and judged by Patrick Grant and May Martin, The Great British Sewing Bee: Sew Your Own Wardrobe is a practical sewing book brimming with fantastic projects, including a core of wardrobe essentials including a pencil skirt, easy T-shirt top and a wrap dress. Menswear and retro garments are also included, as well as a fun selection of designs for babies and small children. Dress sizes range from (UK) 8 to 18 and the book is full of inspiring photography so you know exactly what you're looking for - and the included pattern pack, containing five full-size pattern sheets, makes creating your wardrobe even easier.' (Quote from Quadrille)
The Butterfly Balcony Review of The Great British Sewing Bee: Sew Your Own Wardrobe

TGBSB: Sew Your Own Wardrobe, is the second book in the series and was produced to complement the second series of TGBSB, which aired in 2014. The book has been broken up into four chapters Basics, Fabric, Fit and Finish.

~ Basics ~
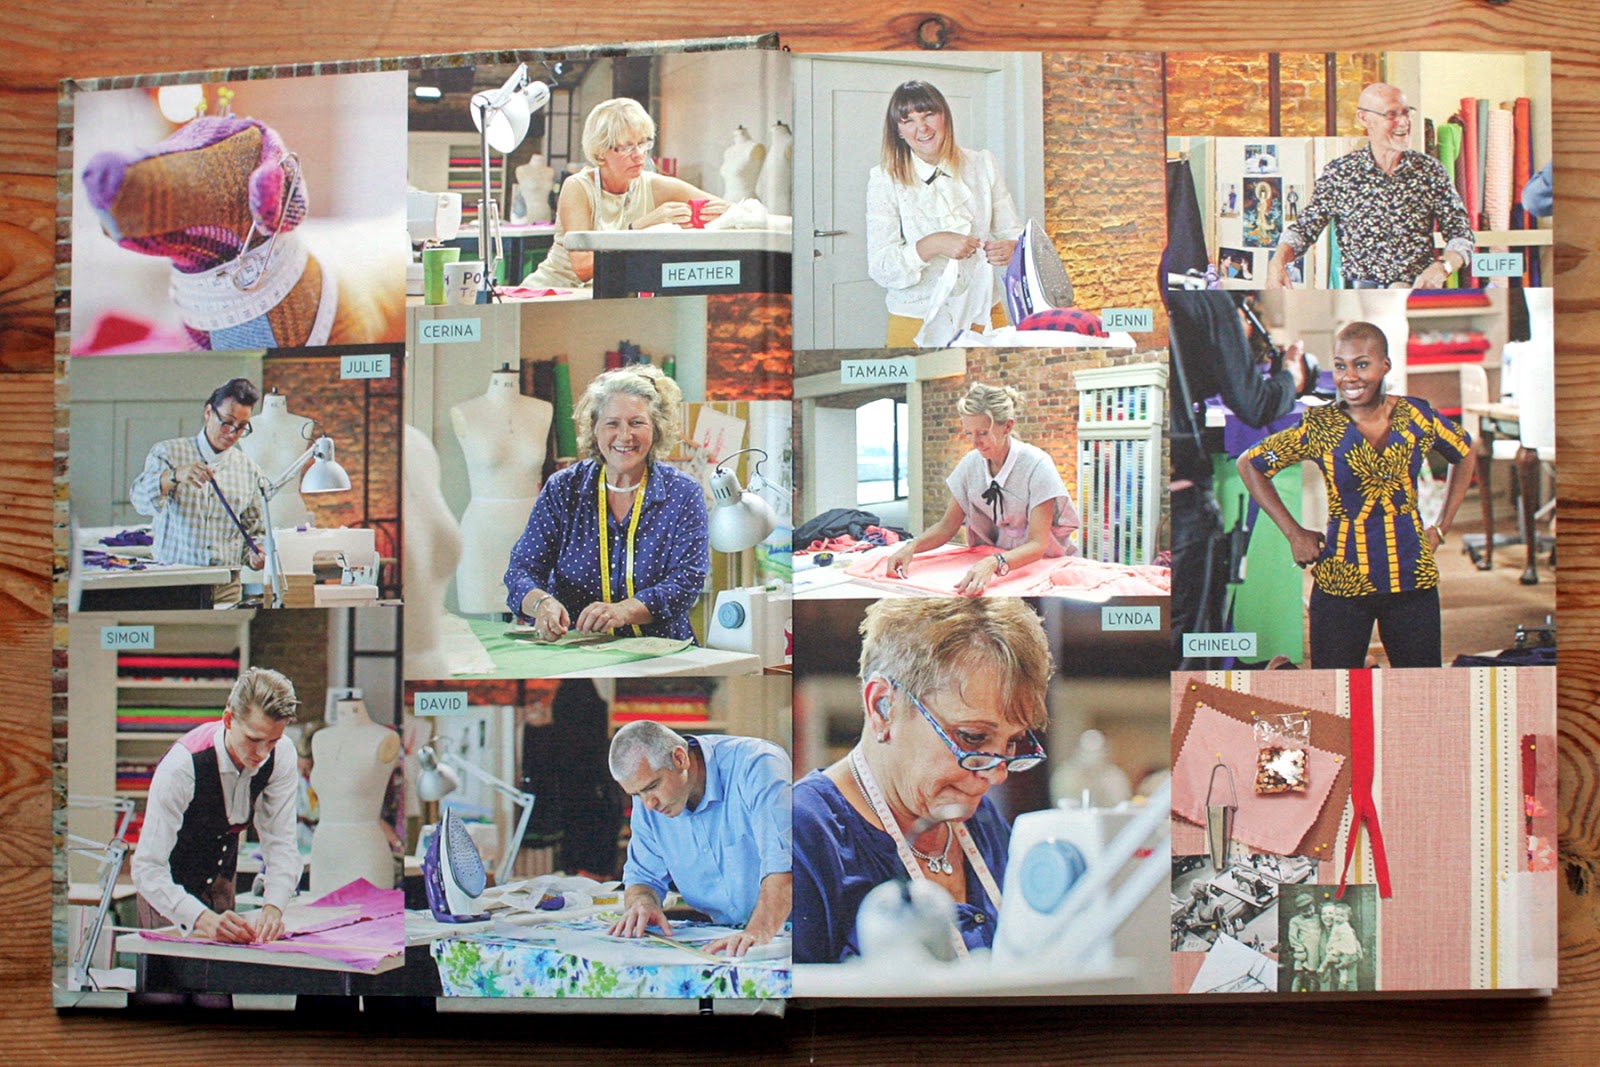
The first Chapter is 'Basics' which deals with the skills and techniques you'll need to complete the projects in the later chapters plus two self-draft / no pattern garments.
The Butterfly Balcony - Review of The Great British Sewing Bee: Sew Your Own Wardrobe
~ A-Line Pinafore ~ Glorious Gown ~


 Also included are the sizes for all of the adult projects in the following chapters:

Men's:
Small: 34-36" chest / 28-30" waist / 35-37" hip
Medium: 38-40" chest / 32-34" waist / 39-41" hip
Large: 42-44" chest / 36-38" waist / 43-45" hip
XL: 46-48" chest / 40-42" waist / 47-49" hip

Women's:
UK 8: 31.5" bust / 24" waist / 33.5"hip
UK 10: 32.5 bust / 25" waist / 34.5" hip
UK 12: 34" bust / 26.5" waist / 36" hip
UK 14: 36" bust / 28" waist / 38" hip
UK 16: 38" bust / 30" waist / 40" hip
UK 18: 40" bust / 32" waist / 42" hip

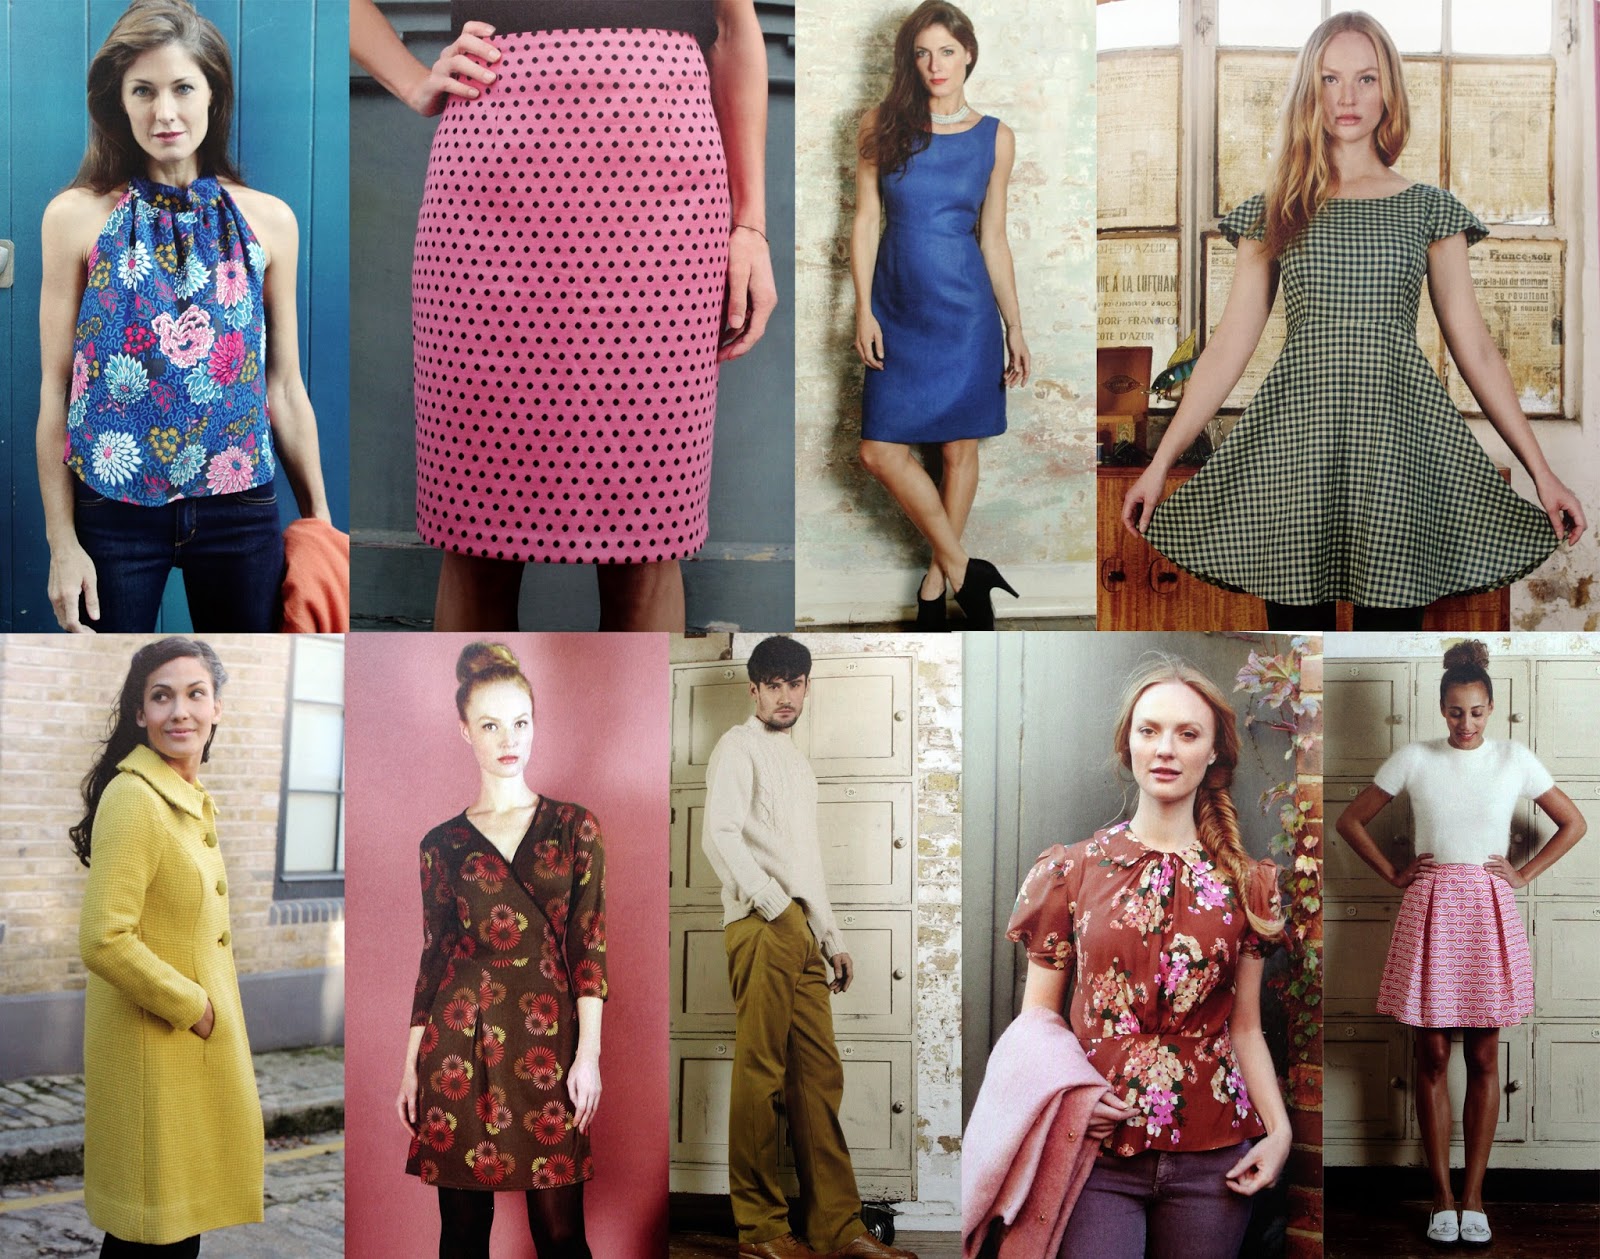
The remaining three chapters contain all the pattern instructions.  Each pattern has a difficulty rating and falls in one of four levels Easiest, Easy, Moderate and Tricky.

Fabric ~
The Butterfly Balcony - Review of The Great British Sewing Bee: Sew Your Own Wardrobe
~ Aztec Leggings ~ Men's (?) Waistcoat ~ Silk Tunic ~ Anorak ~ 
~ Teddy Pram Suit ~ Prom Dress ~ Easy-sew Short Skirt ~ Men's Shirt ~


Fit ~
The Butterfly Balcony - Review of The Great British Sewing Bee: Sew Your Own Wardrobe
~ Draped Top ~ Pencil Skirt ~ Shift Dress  ~ Full Skirted Dress 
1960's Coat ~ Wrap Dress ~ Men's Trousers ~ 1930s Blouse ~ Box Pleat Skirt ~


Finish ~
The Butterfly Balcony - Review of The Great British Sewing Bee: Sew Your Own Wardrobe
~ Simple T-shirt ~ Yoke Skirt ~ Baby Dungarees ~ Slip Dress ~ 
~Women's Bowling Shirt ~ Baby Dress and Knickers ~ Girls Dress ~


All the patterns for Fabric, Fit and Finish are contained in a separate folder, multi-sized and ready for you to trace off and get sewing. There is also a link HERE to Quadrille's page for the book where all the patterns are available as individual PDF downloads!

The Butterfly Balcony - Review of The Great British Sewing Bee: Sew Your Own Wardrobe


~ The Good Points ~
~There are a good range of patterns for all the family and there to my mind at least there are no pesky fillers! There are even 4 for patterns men, which is a lovely surprise and about time too! Though that waistcoat definitely has the buttons on the wrong side for boys!
~ The book is beautifully designed and photographed making it an inspiring book to have on your bookshelf and at your sewing station!
~ There is a section on taking your own measurements and checking your silhouette which is really very useful.
~ No annoying dust jacket! Is it just me who finds them frustrating on craft books, they always get creased and bent and end up looking tatty!
~ All the patterns are included full size in the book meaning you don't need to re-scale or download anything before you get started, just grab your tracing (or baking) paper and your good to go! Plus the fact that there is the option for PDF's, is a great addition!
~ Did I mention there are LOADS of patterns! For a hardback book with 24 sewing patterns, it's a bargain! The cheapest I could find in the UK was for £6.00 from Amazon, which is a whole lot of patterns for under a tenner!

The Butterfly Balcony - Review of The Great British Sewing Bee: Sew Your Own Wardrobe

~ The Not So Good Points ~
~ The pattern sheets are a little confusing as the pieces are not necessarily all on the same sheet or in the same colour, but having access to printable PDF's negates this somewhat.
~ You will need to jump about the book a bit to find all of the instructions for some patterns which can be a little confusing.
~ Some things just get a little glossed over and not properly explained (see my post about The Men's Shirt) and there are sections where the proofreading seems to have been overlooked, such a shame for a book all about precision. As long as you are not a complete beginner you will be able to muddle through the discrepancies in the instructions, keep youtube tutorials on standby people!
~ It would be really helpful if every pattern had good clear images of the garment, the artistic photos are gorgeous, but from a practical point of view, it's not always that easy to see the construction of the garment that clearly.

The Butterfly Balcony - Review of The Great British Sewing Bee: Sew Your Own Wardrobe


~  My Verdict 
TGBSB: Sew Your Own Wardrobe is all about learning the art of precision sewing; sewing that May and Patrick would be proud of, which perhaps means that this book is not really aimed at those who are just starting out (despite its claims). Most of the patterns are a little more difficult than basic so will be great for taking your existing skills up to the next level, but perhaps not so suitable for those wanting to dip their toe in the water for the first time, rather something to work up to!

The Butterfly Balcony - Review of The Great British Sewing Bee: Sew Your Own Wardrobe

The patterns in the book are all great, to my mind there aren't any fillers. The real standout patterns for me are the Men's Shirt, the striking yellow 1960s Coat, the 1930s Blouse and the loose T-shirt, which looks lovely and simple to make plus very comfortable! Oh and the teddy suit for a baby is so adorable that makes me tempted to have one of my own, almost! I was lucky enough to get my copy as a Christmas gift, but I certainly think it's worth spending your pennies on, the good points about this book certainly outweigh the bad and I really think it would make a great addition to any sewers bookshelf!

The Butterfly Balcony - Review of The Great British Sewing Bee: Sew Your Own Wardrobe

I hope that you enjoyed this review and if you have been pondering buying this book I have helped you to make a more informed decision!

Have you got this book, what did you think?

Wendy x