Sunday 25 October 2015

The Kitchen Front - Sloe Gin

Last year I was given a small bottle of Sloe Gin by a neighbour, not being much of drinker I had never tried it before and I'll be honest I didn't think I would like it much but I was wrong (I'm always disappointed that red wine doesn't taste more like blackcurrant cordial, but then I am from the Alcopop era!), it was really quite delicious if a little on the strong side! So being a lover of all things homemade I knew it was definitely something I would like to try myself, well, once I had located a blackthorn hoard that is!
How To Make Sloe Gin - Last year I was given a small bottle of Sloe Gin by a neighbour, not being much of drinker I had never tried it before and it was really quite delicious if a little on the strong side! So being a lover of all things home made I knew it was definitely something I would like to try myself, well, once I had located a blackthorn hoard that is!

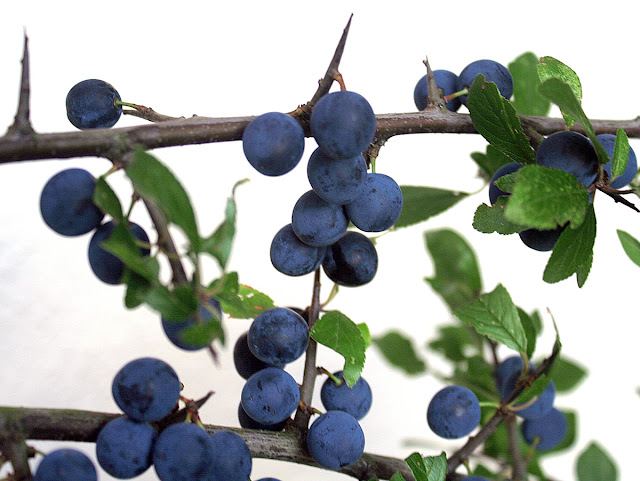
Luckily for me after taking a short cut back from my allotment a few weeks back I spotted a wealth of little purple berries on the bushes that lined the path, to be honest it took me a moment to realise what they were, but after a quick Google to check that the leaf shape resembled those of the blackthorn and not some hideously poisonous cousin (I don't know if there is one but it's always best to check! They are actually related to plums, and have quite a lot of fascinating folklore and history attached to them, though good lord, do not attempt to eat one, mergh!) I decided to pop back and pick some.

How To Make Sloe Gin - Last year I was given a small bottle of Sloe Gin by a neighbour, not being much of drinker I had never tried it before and it was really quite delicious if a little on the strong side! So being a lover of all things home made I knew it was definitely something I would like to try myself, well, once I had located a blackthorn hoard that is!

There are all sorts of advice on when to pick sloes, late August, early October, late October, even December, when the berries are more black than blue, when the berries are very squishy, when some of the berries on the bush are shrivelled, but the most common advice was to pick after the first frosts of Autumn as this helps the sour little berry to release its flavour into the gin. Overwhelmed by this wealth of opinions I chose to pick mine in late August a few days after my sighting, as the bushes were abundant and the berries had developed their dark blue bloomed hue and looked ripe to me, Whether this was too early, well I will just have to wait and see, but as the advice is as varied as it is long I decide to take a chance!

How To Make Sloe Gin - Last year I was given a small bottle of Sloe Gin by a neighbour, not being much of drinker I had never tried it before and it was really quite delicious if a little on the strong side! So being a lover of all things home made I knew it was definitely something I would like to try myself, well, once I had located a blackthorn hoard that is!

Berries picked, it was now time to choose a recipe. Here again, I came across a multitude of different opinions on how to create the perfect tipple. Some recipes require precise measurement of ingredients and others don't, many recipes suggest adding lots of sugar at the start and others add it towards the end, some insist you get the best Sloe Gin by starting with an expensive gin and others swear by a cheap one. In the end, I settled for the most simplistic recipe I could find and some cheap and cheerful Tesco's gin.

~ Sloe Gin ~

How To Make Sloe Gin - Last year I was given a small bottle of Sloe Gin by a neighbour, not being much of drinker I had never tried it before and it was really quite delicious if a little on the strong side! So being a lover of all things home made I knew it was definitely something I would like to try myself, well, once I had located a blackthorn hoard that is!
Ingredients:
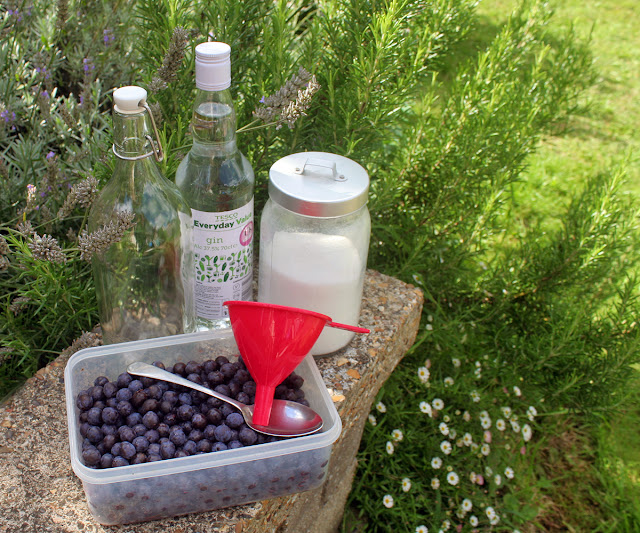
1 bottle of Gin
1 lb of Sloes approx  
If you can't find a blackthorn bush then you could buy some berries from those that can here
Sterilised bottle or jar which is airtight - mine was from Ikea
2 large Spoonfuls of Sugar
A funnel for pouring the Gin & Sugar

Once you have picked your sloes give them a quick check over for maggots and stalks, then pop them in the freezer for 24 hrs. or overnight, this will mimic the first frost of Autumn and start to break down the flesh.

How To Make Sloe Gin - Last year I was given a small bottle of Sloe Gin by a neighbour, not being much of drinker I had never tried it before and it was really quite delicious if a little on the strong side! So being a lover of all things home made I knew it was definitely something I would like to try myself, well, once I had located a blackthorn hoard that is!

When ready to make your gin take your berries out of the freezer and let them defrost before bottling. Your berries should have started to break up a little but if not (like mine) you can either bash them with a culinary mallet or rolling pin, or the most traditional way would be to pierce the berries with a silver needle or a thorn from the bush you picked them from, I used a sewing pin as it was what I had to hand and sat out in the sunshine I found it to be quite a relaxing activity!


Fill your sterilised jar or bottle halfway up with pierced berries and then pour over your gin, leave a little air gap for now, and add in your 2 spoons of sugar - Adding a small amount of sugar at this stage is the easiest way to tailor the sweetness of your gin to your preference, it is difficult to judge how sweet it will become before it has matured and so it is easier to add more sugar later on in the process.

How To Make Sloe Gin - Last year I was given a small bottle of Sloe Gin by a neighbour, not being much of drinker I had never tried it before and it was really quite delicious if a little on the strong side! So being a lover of all things home made I knew it was definitely something I would like to try myself, well, once I had located a blackthorn hoard that is!
Seal your container and give it a good shake until the sugar starts to dissolve into the liquid then top up with any remaining gin and give a final shake before storing on its side in a cool dark place turning every few days.

How To Make Sloe Gin - Last year I was given a small bottle of Sloe Gin by a neighbour, not being much of drinker I had never tried it before and it was really quite delicious if a little on the strong side! So being a lover of all things home made I knew it was definitely something I would like to try myself, well, once I had located a blackthorn hoard that is!

Now for the difficult bit, waiting to sample it! 

For best results (every recipe agreed on this point) it needs to be left to macerate for at least two months to give those little berries a chance to release all their yummy flavour into the gin. As I have chosen the method which only adds a little sugar at the start I will need to add more to taste in a month or two, this can be done by making up a sugar syrup - mix equal amounts of sugar and water dissolved over a low heat, leave to cool and then add the syrup into your gin and then reseal for a few more days. It has been a few weeks since I bottled mine and the colour is slowly getting richer so if all goes to plan it should be ready for a colourful Christmas tipple!

Have you ever made sloe gin and do you have any tips?

Wendy x

Friday 23 October 2015

Knit It - The Date Maker

Hello, it's been a while, hasn't it! Goodness this year seems to have gone by in a whirl and I am still spinning from all the wonderful things that have happened, so much so that I have been struggling to know where to start with getting this little blog up to date and rather than procrastinate any further I've decided I am going to show off my recently finished knit, after a quick preamble to set the scene that is, by now you'd expect nothing less!

A few weekends ago it was the annual IWM Duxford air show, I thoroughly enjoyed last years event despite a very early start, so I knew that I would have just as much fun this year, weather permitting, so ordered some tickets and popped along!


I was not disappointed, the weather turned out to be utterly perfect and the show was just spectacular! As it was the 75th Anniversary celebrations of the Battle of Britain there were lots of warbirds in flight and lots and lots of Spitfires (I do love a Spit). I won't overwhelmed you all with all my pictures here, but there are many more over on Flickr if that takes your fancy!

I'd decided if the weather was going to be anything like it had been for most of the summer (read: cold and windy) then I was going to need a good cardigan to keep the chills at bay. So I searched The Vintage Pattern Files for some inspiration (about time I used it myself!) My criteria was simple it needed to be 1940s in style and relatively quick to knit, as I only had about three weeks until the show. After a little searching, I found the perfect pattern, one that has actually been nearing the top of my knit list for ages, it was finally time to make a date with The Date Maker!

~ Date Maker Sports Jacket ~
Columbia Style Book 1946
Free Pattern: 
Size: 
38-40" Bust
Yarn: 
Needles:
US size 7 / 4.5mm

Wendy at Duxford Airshow 2015 wearing her newly finished Date Maker jacket


So I had my pattern, but there was just the small matter of re-sizing to contend with. The pattern is designed for a 32-34" bust so I was going to need some major up scaling for it to fit my 38-40" measurement. I had a quick look on Ravelry to see if anyone had any advice for resizing but found nothing, so I settled back and knitted many, many, many tension squares on various different sized needles and yarns. It was totally worth the effort, as after all my testing I discovered that because my knitting style is loose I could use an Aran weight yarn and the recommended 5mm needles, and get the extra inches I needed for it to comfortably fit me without having to change anything else!

1940's Date Maker Sports Jacket Columbia Style Book 1946 Free Pattern

When choosing a colour I just knew it had to be red, no indecision there, so I ordered some really lovely Stylecraft Cardinal yarn from Wool Warehouse and waited impatiently for it to arrive. Luckily it turned up on the Friday just before the summer bank holiday, which meant I was able to make the most of the extra time off I had and devote it to knitting! That extra time and the fact that this is a super quick pattern to knit meant that it only took me 3 weeks (22 days to be exact!) to knit, block and sew together, for me (a slow knitter) that really is a record!

1940's Date Maker Sports Jacket Columbia Style Book 1946 Free Pattern
The pattern is very simple to create and after a few repeats very easy to remember. Essentially it's a rib pattern, which is staggered either side of the centre 2 stitches, which creates the wonderful diagonal lines which make this jacket so appealing! The first row is where you stagger your three knit and purl stitches in the direction you want the diagonal to go. The second row is what I call a confirmation row, it's where you knit all the purl stitches and purl all the knit stitches, essentially using the row below as a guide, which is great as it gives you a chance to rest your mind for a bit!

1940's Date Maker Sports Jacket Columbia Style Book 1946 Free Pattern

After knitting all the sections, I blocked each piece to ensure that it came out to the size I needed, this worked really well, apart from Beau choosing to sleep on the back section while it was drying, meaning the ribbing got a little more flattened that I was hoping for, though I am sure after it's next washed it should spring back! Once it was all dry I knitted the cuffs and attached them to the sleeves before seaming up the sides. I have to say the sleeves are my favourite part of this pattern, I love how they look with the V's running up them, that said I still have a dislike of knitting sleeves which can be felt by the fact I could have knitted them a smidgen and a half longer (probably 2" if I am honest) as they are just on the edge of being long enough for my gangly limbs!

1940's Date Maker Sports Jacket Columbia Style Book 1946 Free Pattern

After joining all the body sections together it was time to crochet around the neckline. I have to say I found this the most tricky bit of the whole process, as no matter how hard I tried I could not stop the points of the neckline curling up, I figure it's designed to be worn with a collared blouse so I am not too worried about it, though it is irritating!

1940's Date Maker Sports Jacket Columbia Style Book 1946 Free Pattern

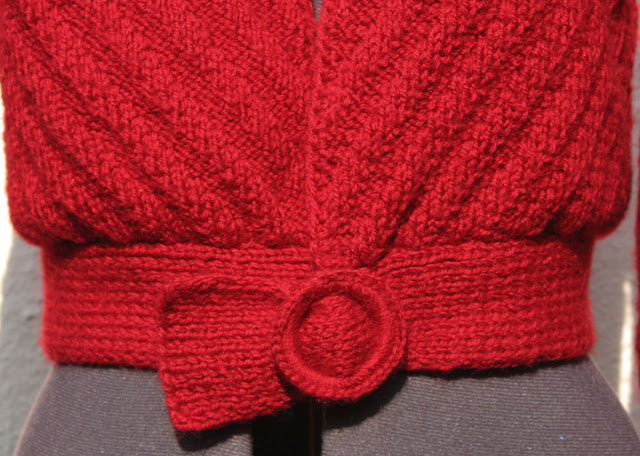
Next was knitting the waistband. I started by knitting to the measurements of the lower edge of the jacket, adding a few extra inches for the buckle flap, but once I tried the jacket on realised my error, it was just too baggy and the buckle was not going to be able to cinch the waist in at all. So reluctantly I unpicked the band and re-attached it, this time, stretching it against the lower edge as I stitched so that it would give pull in a little more and give the jacket more of a blouse effect which would fit my body more snugly!

1940's Date Maker Sports Jacket Columbia Style Book 1946 Free Pattern

Last up was covering and attaching the buckle, I used this video to help me crochet over the buckle and then attached it to the lower edge of the jacket, it's only later that I realised I had sewn the waistband on the wrong way, blast, it should close right to left, not left to right, but who's going to know, well apart from me and you, and you won't tell will you!

Wendy at Duxford Airshow 2015 wearing her Date Maker Jacket

So I had finished it in time for Duxford, and there was no frantic sewing in of ends on the way there either, which is utterly unheard of! As it turned out the weather was the warmest had been all summer and so I did feel a little bit toasty, as the fabric created by all the ribbing is quite dense, but I loved wearing it so much that I persevered through the heat! I have actually worn it quite a bit since and can honestly say it's the comfiest thing I have knitted so far.

So there you have it my first finished knitted and my first blog post in simply ages, I now just need to fill you all in on all the other fun stuff that has happened while I have been away, this could take some time!

Wendy x