Thursday 23 December 2010

The 39 Steps - A Jolly Good Show!

For my birthday my lovely boyfriend (after much, hint dropping and reminding mind you) got us both tickets to see the amazing theatre production of The 39 StepsI read about the production on the wonderful Fleur's blog earlier this year, I decided as an avid fan of the classic 1935 Hitchcock thriller I would really love to see it for myself.

So what better excuse than a birthday, to put on my glad rags and catch the tube to London's West End for a Saturday matinee of theatrical vintage hilarity!


The 39 steps is running at the Criterion theater in Piccadilly Circus. When The Criterion was built in 1873 Piccadilly Circus didn't even exist!  The circus as we now know it actually developed around the theatre to reduce traffic congesting and the statue of Eros has moved several times - An interesting fact I learnt whilst researching the theatre's history, is that the statue we all refer to as Eros (officially titled the Angel of Christian Charity) actually depicts Anteros, the twin brother of Eros. Physically, he is similar to Eros in every way, but with long hair and butterfly wings, were Eros has birds wings!


During the blitz of WWII, the BBC commandeered the theatre to broadcast their light entertainment radio shows from, due to the whole theatre being underground which meant that it provided a safe haven from Hitler's bombs. Since its opening in 1874, the theatre has undergone many refurbishments and alterations thought retains its late 19th-century charm. The decor of the theatre is sublime you feel you are walking down into a time capsule as you descend the stairs to the foyer/bar area which is lined with splendid coloured Minton tiles (I am reliably informed) and mirrors.

The theatre itself is quite small but feels cozy and its size means you really do feel like part of the action  - and we were sat in the dress circle, and though quite far back and didn't feel left out!


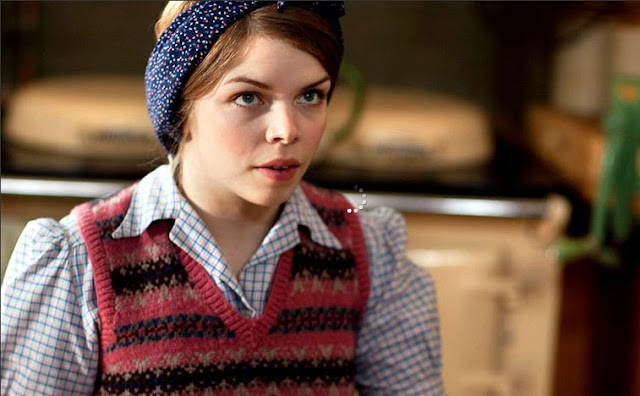
If you are not familiar with the Hitchcock film it is loosely based on the espionage novel of the same name by John Buchan. The film stars a very dashing Robert Donat as Richard Hannay and the beautiful Madeleine Carroll as Pamela. The story revolves around our resourceful hero Hannay, who becomes caught up in an international spying conspiracy and is pursued by both foreign agents and the police across Britain (a fantastic review of the film can be found here). Essentially It is a spy story of epic proportions and considered to be a precursor to 'North By Northwest' which many call 'The American 39 Steps'


(Source)

The stage adaptation is an affectionate pastiche of the original Hitchcock classic, the humour is slick, fast paced, and very much slapstick. So if you're looking for highbrow comedy then you are in for a disappointment. Played by a cast of just four actors, it is quite amazing how they managed to create all of 139 different characters needed - I did not count them myself, another reliable source!

The whole thing was truly hilarious, the timing was spot on, it is such a well-choreographed adaptation, it truly doesn't miss a beat. The other lovely thing is that you genuinely feel that the actors are enjoying the performance as much as the audience which makes the whole thing much more enjoyable! So if you love spy movies of old, and comedy so silly it brings out your inner eight year old, then I would heartily recommend catching it if you can!


Wendy x

Saturday 11 December 2010

'From the Back of My Mind..'

It has to be said have a very varied taste in music. I love everything from Big band to Blur (with a few notable exceptions but that's a story for another day). Growing up in the 90's my musical taste has been hugely influenced by the Indie/Brit pop of the day. So when I found out that my favourite, of all favourite bands of the 90's, Cast were reforming for a 15th anniversary gig, I was over the moon. Being a bit too young to see them perform first time round, I was adamant that I was not going to miss out this time!


I decide that I would be nice to go and see them in their homecoming gig at the O2 academy in Liverpool. Also as it was my birthday a few days after the gig, it gave me a great excuse to go and visit my folks. For lots of jelly and trifle - you can never be too old for jelly and trifle!!


I was a little apprehensive, Now I loved them 15 years ago, possibly a bit too much it must be said, but would they still be as good as I had hoped?


Well yes, and sooo much better, they completely blew me away!
They sounded so much better live than I had ever imagined, surpassing their recordings, which is truly saying something as some bands I have seen just don't have the same magic live!!  I was not the only one (but nearly) who was dancing around like a loon much to my very trendy brother's despair - he kept it to the simple appreciative head-bob, de rigueur of the shoegazing male gig goers!


The Liverpool 02 Academy is a great venue it's quite small, enabling you to get quite close to the front, but without feeling trapped! So the whole thing felt very intimate and a just little bit sweaty! The only low point which was small was that due to the number of people in the venue, there was quite a lot of sweat-fuelled condensation dripping from the ceiling!


 Little Bro AKA 'The Trendy One'

I have to say I had a truly fabulous evening reliving my youth, it has reignited my love of music again which is no bad thing. It was the best birthday early present to myself I have had in ages and of course being with my family was great too!

I'll leave you with where for me my love of loud music, guitars, and boys in bands, started with 'Walk Away' the single of which I had on cassette (Now I do feel old!) and played constantly on my Walkman: until the point where it had stretched beyond all recognition, ahh those were the days!


Wendy x

Friday 26 November 2010

Knit It - Toddlers 30s Winter Warmers

My mum has asked me to make a woollen winter set (hat, mittens, and scarf) for her God Daughter Imogen for Christmas. So began my yearly Christmas crafting endeavour.

I knew I wanted to knit something in keeping with the vintage vibe that I hold so dear, but still, something that is cute enough not to look out of place on today's fashion-conscious toddler. All of the patterns I used were freely available on the net - Oh the wonders of Ravelry's pattern search engine!

I loved the adult version of the 'Bow Knot Scarf' so much when I saw it on Ravelry, that I knew I wanted to make Imogen one just like it. Not only did it have a very 1930s style it also seemed a safer option for a toddler to a standard scarf as there was less risk of it getting caught and hurting her.

The Butterfly Balcony Toddlers 30's Winter Warmers Knitting Patterns

After doing a bit of searching (again on Ravelry) I found this lovely child's winter set from Drops Yarn. It was a really easy pattern to follow, especially as it was all in garter stitch! I also really loved the ingenious way that the channel for the tuck was created! I am certainly going to make an adult sized one soon! Once I had finished the scarf I needed to find a suitable Hat. I wanted something in keeping with the 1930's style of the scarf also it needed to be in garter stitch.

The Butterfly Balcony Toddlers 30's Winter Warmers Knitting Patterns

So I improvised, by using last years Xmas baby hats as a guide. I increased the quantity of the rows and stitches so that it would fit a toddler - I hope! Once I'd finished, I felt it looked a bit plain, so I created a bow to match the scarf to stitch on the front. If you like the pattern you can find it on my Ravelry page here.

Lastly the mittens, I have to confess that these have come out a tad on the large side; I found the pattern at Panda Man's Knitting Corner. I must confess to losing track of my rows whilst knitting, I blame the TV, which means they've not come out as well as I would have liked, there are a quite a few hole around the joint on the thumb!  The pattern, however, is very easy to follow, even if it requires you to work out the sizing for yourself, clearly not my strong point!

The Butterfly Balcony Toddlers 30's Winter Warmers Knitting Patterns

This year there are, including Imogen, two extra little ones to make for which means I am currently sporting very achy hands from all the knitting I have been doing. So far Imogen's winter set is the only thing I have finished. I am hoping to have more to show you all soon. Plus progress on my Perfect Xmas Jumper too!

I am off to my parents this weekend for an early birthday treat!
 I'm going to relive a bit of my teenage youth, I will tell all on my return!

Have a great Weekend!
Wendy x

The Fringe Benefits!

AKA Don't Try This At Home

I have a confession to make, last weekend I did something very stupid, or very brave: I cut my own fringe, please don't tell my mum!

I have for some time now wanted a fringe just like Chuck (Anna Friel) has in pushing daisies which is essentially a 60s peekaboo style. I know it's not really in keeping with my 1940s obsession at all, but I am sure I will still be able to style it into a forties style when I want to.

(Source)


I have attempted to get this style of fringe on no less than three different hair cutting occasions, and each time I have left the salon without my fringe. I think the problem stems from my fear of having my hair cut at all (it's on a par with the dentist for me) as I get very nervous and probably don't explain what I want properly. The best I have had so far, was a long tuft which was swept to one side - which did look OK but it was not what I wanted - no photographic evidence remains, thank heavens!


So, on Saturday evening after re-watching my Pushing Daisies DVD for the umpteenth time, I decided I had enough of my lacklustre hairstyle. I wanted my fringe and I wanted it now! After all how hard could it be to cut your own fringe!? - I should point out before I continue that I am well aware that this could have gone very badly wrong - I once asked the boyfriend (a qualified engineer, by the way, straight lines should be part of the job) to trim an existing fringe, only to end up with right side perfect and left side 1" shorter than right! This was only days before my best friends wedding which I was going to be a bridesmaid, the poor wedding hairstylist had to practically glue the thing in a sweep across my head with hairspray!  My own fault I know so will I ever learn? not likely!

Image Source :The Vintage Wife
So, this time, I did my research and passed on the boyfriend's offer to "cut it for me" his idea of a joke, funny? Armed with Google, YouTube and far too much confidence in my abilities, I decided to to take my hair into my own hands.

Most of the YouTube tutorials I found were all about trimming an existing fringe not creating one from scratch. I was about to give up when I found 'The Vintage Wife's' wonderful blog post all about how to cut your bangs/fringe from scratch no pre-existing haircut needed. Plus the illustration of Audrey gave me the confidence to give it a go!


Firstly I washed and blow dried my hair leaving it just a little bit damp just enough to make it easy to part the hair. I quickly realised that the key to the perfect fringe is to section the hair off correctly. For the style I wanted I needed quite a high upside down v shape (as in the Audrey Picture) lined up with the edges of my eyebrows.

The Before - The After


I also used one tip gleaned from all the YouTube tutorials I waded through, which is to twist the hair tightly in front of your face and then cut across, this seemed to give the fringe a curved shape a little longer at the sides than in the middle, which softens the whole thing. There is a great video by Sam Villa which explains the whole thing!

I gradually worked my way up the sectioned hair getting shorter and shorter until I reached a point where I felt happy. Then I used a pair of thinning scissors (which you can get from most chemist stores) to, you guessed it, thin the ends out a little and take some of the weight off.

The finished result, will I ever get the hang of a selfie!


All in all, I am really happy with it, I have to admit it is just a little too long, but I am going to live with it for a few days and then trim it up a little bit. Let's just hope I don't snatch defeat from the jaws of victory!

If your as crazy as me then here is some YouTube fringe/bang inspiration, but remember To Always Snip Responsibly:
  • For a good explanation of how to achieve various different styles look at Miss Curly Locks video.
  • For the best 1940s Betty Page Bangs Tutorial take a peek at Strawbwerry Koi Vintage video.
  • If Straight Bangs are your thing then biancablovesu's video will be right up you street.
Wendy x

Wednesday 24 November 2010

Knit It - Hand Knitteds by Lincolin


A link I found through Ravelry
lead me to here where you can download the 1940s knitting pattern booklet
'Hand Knitteds by Lincolin'
for free, which contains this little lacy beauty and many others, and as if that was not enough, there is also a 1930s  jumper pattern for free too!

For more FREE vintage knitting & sewing patterns head on over to my other blog  The Vintage Pattern Files!

Enjoy
Wendy x

Saturday 6 November 2010

Knit It - Poppy Appeal

It's that time of year again when our nation comes together in showing it's support for our Armed Forces and in remembrance of the sacrifices made by British and Commonwealth Servicemen and women by wearing the traditional red poppy.


The Butterfly Balcony Poppy Appeal knitting pattern


If you are a knitter you can do your bit by downloading the official knitted poppy pattern from 'Knit on the net'. For a small donation of £2 you can download the pdf pattern, from which you can create your very own Remembrance Day Poppy, knowing that all of the proceeds will go straight to The British Legion and The Help For Heroes Charities.

You can wear your knitted poppy out year after year - as long as you are willing to pop some money in your nearest donation box. Simple!

Wendy x

Monday 1 November 2010

BBC Land Girls

Just popping in to let you know, if you missed it the first time round (like me) Land Girls is available to watch and download in the BBC iPlayer - be quick though as it wont be around long.

You've got to love Bea's fair isle tanktop
Made last year to commemorate the 70th anniversary of the start of WWII, it follows the lives of four girls (Annie, Bea, Joyce and Nancy) doing there bit for king and country whilst dealing with the challenges of their own lives. I spent a lazy Sunday watching all the episodes and can honestly say it's a great series, it even kept the boyfriend engaged which is saying something!


The clothes as you would expect from a BBC period drama, are just drool worthy, all those wellies, shirts with tank tops, knotted head scarves and woolley cardigans which made me feel all autumnal. I especially loved Bea's pink fair isle tank top and Nancy's powder blue coat (in the first episode) is just amazing.

The DVD will be released in the new year so if you miss it you wont have to wait too long and I believe there will be a second series at some point next year too!

Enjoy!
Wendy x

Thursday 21 October 2010

Sew It - The Holly Sleep Mask

It was a few weekends ago now, while spending the day watching Audrey Hepburn films (and generally avoiding doing anything that could be considered as useful) that I was reminded of the wonderfully eccentric sleep mask that Audrey wears in 'Breakfast at Tiffany's'.

After spending a dreary bank holiday in a, cold and very damp tent in Norfolk, lying wide awake by 5.30am every morning due to the light streaming through the thin layer of canvas, I realised I need a sleep mask so that I could stay sound asleep and warm for as long as possible.


Having been obsessed by the sleep mask Audrey Hepburn wears in 'Breakfast at Tiffany's' since I was a child I decided to make The Holly Sleep Mask. The Pattern is definitely inspired by, rather than a copy of the mask Audrey wears, but is just as fabulous and best of all is really easy to make plus it will bring a touch of Glamour to even the coldest of mornings.


~ The Holly Sleep Mask ~

The Butterfly Balcony - Holly Golightly Sleep Mask


Ingredients: 
The template Found Here
Outer Fabric - I used a cheap blue satin. 
Matching thread 
1" x 24" wide strip of Fabric or length of ribbon (for the ties) 
Padding - Thick Felt, fleece or wadding 
1/2 Meter of Brocade, Ric Rac or Ribbon 

    The Ties
    1. Cut your fabric to 1"x 24". Fold in half (right-sides together) and give a blast with the iron.

    2. Sew down the length and across both ends.

    3. Fold the fabric in half (each tie will be 12" long) and cut across the fold.

    4. Using a blunt pencil or the back end of a knitting needle, turn each tie the right-way out.

    5. Stitch over the raw end to stop it fraying inside the mask once attached.

    The Mask
    1. Fold your outer fabric in half (right-sides together) and give it a quick blast with the iron, this is really useful when using a shiny fabric such as satin as it build up a bit of static which, stops it slipping around as much.

    The Butterfly Balcony - Holly Golightly Sleep Mask
    Padding Pinned to Outer Fabric

    2. Pin the pattern to the fabric and cut making your cut line a little larger than the pattern by aprox. 1/2 cm.

    3. Pin and cut out the padding fabric cut this to the same sizes as the pattern.

    4. Keeping the two outer pieces right sides together pin the padding fabric on to the top.

    The Butterfly Balcony - Holly Golightly Sleep Mask5. Stitch around the edge of the padding fabric leaving a gap on the left and right sides (this is where the straps will go).

    6. Trim the outer fabric close to the sewn line and then zig zag around the edge, following the same line as the straight stitching.

    The Butterfly Balcony - Holly Golightly Sleep Mask
    Gap left to turn right-side out


    7. As carefully as possible, turn the mask the right way out, try avoid pulling too much as it may fray the outer fabric.

    8. Insert the raw end of each side strap in to the gap, turn the edges in so that you have a smooth edge and pin closed.

    9. Sew over the gap either by hand or on the machine - the brocade will cover this stitching so it wont be visible.

    10. Pin your brocade around the front of the mask starting at the nose arch. Once you have got back to where you started, leave a small bit to tuck under to stop it fraying.

    The Butterfly Balcony - Holly Golightly Sleep Mask
    Pined and ready to be hand sewn.
    11. Hand sew your brocade to your mask with a matching thread. Making sure that the ends are tucked in neatly then your done!


    If you did want to make your mask more like the original, I am sure it would be quite easy to do, following the same pattern but using a light blue felt for the main fabric, use felt triangles for the eyelids with a large glass beads underneath and use gold Ric Rac for the brows and trim!!

    Now your ready to sleep in till noon and then have your breakfast (well lunch) at Tiffany's!!

    Wendy x

    Wednesday 6 October 2010

    Take a Time Machine to the Twenties

    I was completely blown away when I saw this film clip on YouTube and just had to share. It is a test reel taken in 1922 and filmed in Kodachrome. It is just beautiful to watch and gives us a rare colour glimpse in to the past.


    The first actress on the reel is Hope Hampton who is coquettishly modelling costumes from the silent film The Light in the Dark (1922)also known as The Light of Faith which contained the first commercial use of Two-Color Kodachrome. You can watch or download it for free from here!

    Hope Hampton
    Next up is Mary Eaton, she was a leading was stage actress, singer, and dancer in the 1910's and 1920's who enjoyed success in the stage production of the Ziegfeld Follies.

    Mary Eaton (Photo from Here)
    The Last Actress on the reel is Mae Murray who appears ethereal in a wonderful silk dressing gown.
    Murray was a multi-talented woman she was actress, dancer, film producer, and screenwriter. Murray rose to fame during the silent film era and was known as The Girl with the Bee-Stung Lips and also The Gardenia of the Screen.

    Mae Murry (Photo from Here)
    Until next time!
    Wendy x

    Saturday 2 October 2010

    Things To Make & Do - A Quick Catch Up

    I have had a hectic few weeks at work due to organising our company's annual event at the Imperial War Museum Duxford - I work for a model bus company and every year we help sponsor Showbus which is a bus rally held at the museum. Having worked all of last weekend, it is only now that I have found the time and energy to update you all on all the things I have managed to cross off my to-do list over the last few weeks.

    Firstly, it was the 1st Birthday of Keira, my friend Christine's little girl. I decided to make her, her very own version of the Teddy Bear that I have made for her cousins Willow and Emily.


      Due to the lack of time, I decided for the first time to stitch it where possible on the sewing machine, I would normally hand sew as I feel I can make it neater, This actually worked really well and saved me loads of hours of painstaking hand stitching. I also decide to make him a little more individual, so I trimmed his nose a little bit more than I normally would, this worked well, though I got a bit carried away and he does have a small bald patch! oops!!


    Next to be finished was the George cushion for my God Daughter Willow. This was promised to her on her 2nd birthday when I gave her the Peppa Pig one, luckily being only two she didn't hold it against me that it has taken four months to finish.

    And last, but by no means least, is the Debonair Jumper . After a few weeks putting off finishing the last sleeve, I have finally sewed all the bits together and have my very first self-made jumper.  I hope to wear it very soon, but have to confess I am a little scared in case I ruin it ,or catch it on something, as it has had a lot of time and work put into it, I would be heartbroken to spoil it!


    I have spent the day whilst typing up this being very lazy and watching lots of Audrey Hepburn films. Which has given me an idea for an Audrey-inspired post, so watch this space!!

    Wendy x

    Wednesday 8 September 2010

    Crochet It - Vintage Style Bow Beret

    A little while ago I came across a beautiful beret pattern on Ravelry. It is for a vintage style beret with cute little bow on the side which looks very 'Chic!' and best of all the pattern is FREE!

    ~ Puff Stitch Crochet Beret With Bow ~
    (Stash Buster)

    The pattern is from creative yarn a very talented Italian girl who creates, her own beautiful crochet and knitting patterns, many of which are available for free on her blog!

    The Butterfly Balcony - Puff Stitch Crochet Beret With Bow Free Pattern

    Created by
    Ingredients: 
    50g DK wool
     4mm Crochet hook

    Now I am truly hopeless at crochet, my poor mum has tried in vain to teach me many times to no avail. But as I loved this pattern so much, I decided I would give it a go and employ the power of  YouTube and Google to help me muddle through.

    In case any of you also need a little help with crochet too, here are the stitches and how to do them.
    It all went a little WoBbLy!!!


    Ch - Chain 

    Yo -   Wrap yarn around the hook.

    Ps -   Puff Stitch (see video)

    Hdc - Half double crochet (see video

    2Ptog - Puff stitch decrease - *Yo, insert hook into lower stitch, draw up long lp* 3times, Yo and draw through 6 of the loops (this will leave one stitch on the hook and the drawn through yarn), *Yo, insert hook into lower stitch, draw up long lp* 3 times, yo then draw yarn through all loops on hook, ch1. 


    Things I learned 
    • Each puff stitch is made in the top of the puff stitch in the row below not in the chain between (oops!)
    •  It may look a little wobbly whilst you're working the increase rows (see above picture), but don't panic, this should sort itself out once it's finished!
    •  I have absolutely no idea how to get the correct tension in crochet!
    From reading some of the comments on Ravelry it seems that many people found that their attempt differed from the original pattern, as did mine but they all look great and individual none the less! And with it having 184 different projects to date, it is one well tried and tested pattern.

    The Butterfly Balcony - Puff Stitch Crochet Beret With Bow Free Pattern
    The back


    For my attempt, I had to deviate from the pattern a little as when I got to round 16 it was still way too big! so I added two more rounds of decreasing rows to pull it in a bit more :

    Round 15: Work 1Ps in same st as joining and 1 Ps in next 2 st, 2Pstog, *1 Ps in next 3 st, 2Pstog.* around, join.
    Round 15a: Work 1Ps in same st as joining and 1 Ps in next st, 2Pstog, *1 Ps in next 2 st, 2Pstog.* around, join.
    Round 15b: Work 1Ps in same st as joining, 2Pstog, *1 Ps in next st, 2Pstog.* around, join.

    Also, I wrapped the wool around the bow rather than doing the crochet band as my bow came out way bigger than (I think) it was supposed to, so the crocheted band was not really working!


    The derpy close-up
    I am really pleased with how it turned out, I can't wait to wear it out and about, it's not perfect but I am still proud of my first attempt at proper crochet and I am well and truly hooked! 
    Wendy x

    Friday 27 August 2010

    Going Down To Liverpool To Do Knitting ...

     "Hear the sound of a tugboat on the river has a music of its own
    the Goodison choir an' the Anfield army who never walk alone 
    then the sun comes out an' the Liver Bird stands up to stretch his wings
    an' the music starts in a million hearts and that's when Liverpool sings"

    Last week I hopped on a Pendelino bound for Liverpool to see my family. Gosh, I really love Liverpool. I spent a lot of time there growing up, so it feels like going home to me. My mum (me mam) is a Liverpool Lass and so every year we would go for our summer holidays, to visit my granddad and relatives. I have always found the people of Liverpool to be so friendly with an unbeatable sense of humour and you can always be assured of a friendly chat at the bus stop.

    Although my brother and myself, were brought up in London (a few streets away from where I live now) when my parents wanted to sell up and leave London they decided to go and live in my granddad's old house in Liverpool. My brother not having a job at the time decided to go with them and though he was dubious at first he really loves it.


    My parent's house is in Woolton Village, it is really not what people expect when you talk about Liverpool, most people expect only back to back claustrophobic terraced houses (of Bread fame), yes these do exist but much of Liverpool is full of large parks and wonderfully open spaces.

     Village from Woolton Woods
    The village itself is famous for a few things, one being its stone quarry. Woolton quarry supplied the sandstone for many of Liverpool's buildings including the Anglican Cathedral - the red building you can see in the back of the top picture. Also as you would expect much of Woolton's architecture has been made from the same stone which I think gives it a very warm and welcoming feel.

    Another thing Woolton is famous for is its associations with The Beatles - though I'm not sure if you will have heard of them!
    St. Peters Church Woolton
    St. Peter's Church is the resting place of a lady called Eleanor Rigby, though Sir Paul has said that the connection between this grave and the song is coincidental, this does not stop the stream of Beatles fans who swamp the graveyard daily, for a photo and a closer look at the gravestone, and if that's not enough across the road is the church hall where the Quarrymen first played. Oh and another thing, Lord Woolton, the WWII pie man (bet he's never been referred to quite like that before) took his name from the village as he had lived here!


    Around the corner from St Peter's church is a small cinema called the 'Woolton Picture House' it was built in the 1920's and has recently been restored to all its vintage finery. This has to be my favourite place in the whole village, the best thing about this cinema is that it still has an interval between films so that you can buy a dinky ice cream from the usherette! Also on the last Sunday of the month, they show a classic vintage film. This months showing will be the fabulous 'Maltese Falcon', I wish I lived closer!

    Whilst I was there my Mum reminded me that I had a parcel to open. Inside was my copy of 'Vintage Gifts to Knit' by Susan Crawford. Now, if like me you love old Knitting patterns, then you will utterly love this book, it is packed with 16 knitting patterns all inspired by Vintage patterns ranging from the 20's to the 50's.

    The Butterfly Balcony - Vintage Gifts To Knit

    My favourite by far is 'The Perfect Christmas Jumper' it has a wonderful 1940s feel with the puffed sleeves and a gorgeous intarsia reindeer pattern. I have to confess that I have already bought all the wool I will need to make it up and hope to be starting it soon (so it should be ready in time for Christmas.) There's just a small matter of finishing all the other knitting projects I have on the go at the moment!!

    The Butterfly Balcony - Vintage Gifts To Knit

    If you pop over to Susan's Blog Just Call Me Ruby you can see all the patterns for yourselves. I really recommend this book as there are so many diverse patterns, including Men's Socks, a wonderful Cropped Cape, Fair Isle Mittens and a Flower Tea Cozy, plus much more, you are bound to find a gift to knit for everyone.

    I had better go, as I'm off camping in Norfolk this weekend and I am supposed to be packing. I do hope it stops raining!

    Wendy x

    Wednesday 25 August 2010

    Sew It - Simplicity 3688

    At last, I have something vintage and sewing related to write about!! I seem to have hit a bit of a lazy patch with regards to expanding my vintage wardrobe, I have started a few things and have left them half finished. It seems at the moment unless the item is a gift I can't seem to finish it, I guess I must need the pressure of a deadline to work keeping me on track. Anyway, one project I have managed to finish is a long awaited pair of trousers from a new old pattern.

    ~ High Waisted 1940s Swing Trousers ~

    The Butterfly Balcony - Simplicity 3688 1940's Trousers

    Ingredients:
    2m of Cotton blend fabric
    7" Zipper
    1 Button

    I decide to make the high waisted trouser as I have wanted to make them for a while now (about 4 years) and as I needed some new work trousers desperately. I used a dark blue lightweight cotton/nylon mix fabric, which I bought from Walthamstow market for just £1 a meter! The fabric is a little thinner than I would have liked, but it is light enough to make it perfect for summer wear.

    After having made up mainly vintage patterns for a while now, I found it quite a chore to have to locate all the relevant pattern pieces and then cut them from the tissue - I did say I was lazy! Once three the pieces were located they were ever so simple to make up and could be easily done in a couple of hours - providing you have someone the help with pinning the hem!

    The Butterfly Balcony - Simplicity 3688 1940's Trousers

    I am really happy with the result, I did have a bit of trouble with the sides being a little baggy at the hips, but after washing and wearing them a few times this seems to have settled down, also the darts have flattened out and now don't look so puffy. I will definitely be making another pair as they have been so easy, and are so comfortable to wear. Hopefully, It won't take me quite as long to start them this time!!

    Wendy x

    Tuesday 17 August 2010

    Knit It - 1940s Knitted Counterpane

    I decided to knit a baby blanket for my best friend Diane's new arrival Millie. Now a few months have gone by and I am still working on it. So I thought I would share the pattern with you all as it may help to give me the incentive to finish it. Or it may not!

    1940's Counterpane Square Apricot leaf with feather pattern border

    The pattern itself is very easy and makes for very rewarding and quick process, I really love the leaf design it is so simple to do and makes you feel quite clever too!

    ~ 1940s Knitted Counterpane ~
    (Stash Buster)

    This pattern can be knitted on any size needles and using any type of yarn. I used pink double knit (DK) yarn from Yarnfair and Knitted on 4mm / 8 UK / 6 USA needles. It looks lovely knitted up all in one colour, but I am sure it would also look great in a patchwork of many colours!

    1940's Apricot leaf Counterpane pattern with border
    (Free Knitting Pattern Click to make bigger. Right click to Save As)
    One VERY Important thing to point out is all the M1 increases in this pattern are to be done as Yarn Overs to make the lacy holes. NO other increase will work. See the below video.


    Enjoy!
    Wendy x