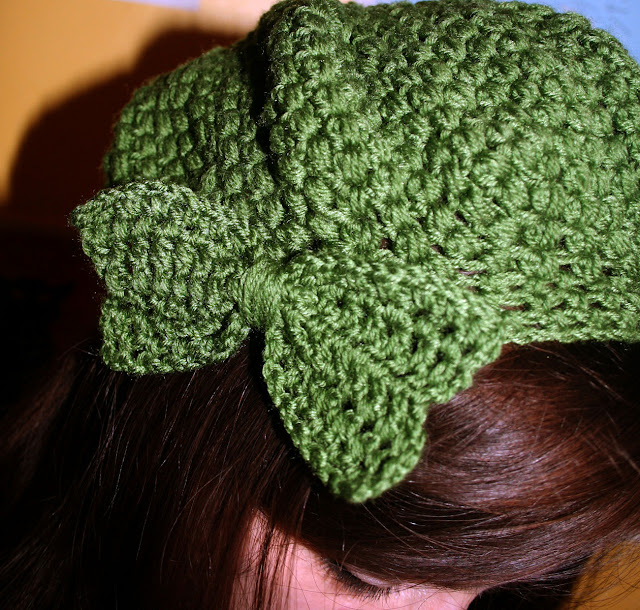
A little while ago I came across a beautiful beret pattern on Ravelry. It is for a vintage style beret with cute little bow on the side which looks very 'Chic!' and best of all the pattern is FREE!
~ Puff Stitch Crochet Beret With Bow ~
(Stash Buster)
The pattern is from creative yarn a very talented Italian girl who creates, her own beautiful crochet and knitting patterns, many of which are available for free on her blog!

Created by:
Free pattern here:
Ingredients:
50g DK wool
4mm Crochet hook
Now I am truly hopeless at crochet, my poor mum has tried in vain to teach me many times to no avail. But as I loved this pattern so much, I decided I would give it a go and employ the power of YouTube and Google to help me muddle through.
 |
| It all went a little WoBbLy!!! |
Ch - Chain
Yo - Wrap yarn around the hook.
Hdc - Half double crochet (see video)
2Ptog - Puff stitch decrease - *Yo, insert hook into lower stitch, draw up long lp* 3times, Yo and draw through 6 of the loops (this will leave one stitch on the hook and the drawn through yarn), *Yo, insert hook into lower stitch, draw up long lp* 3 times, yo then draw yarn through all loops on hook, ch1.
Things I learned
- Each puff stitch is made in the top of the puff stitch in the row below not in the chain between (oops!)
- It may look a little wobbly whilst you're working the increase rows (see above picture), but don't panic, this should sort itself out once it's finished!
- I have absolutely no idea how to get the correct tension in crochet!
From reading some of the comments on Ravelry it seems that many people found that their attempt differed from the original pattern, as did mine but they all look great and individual none the less! And with it having 184 different projects to date, it is one well tried and tested pattern.
 |
| The back |
For my attempt, I had to deviate from the pattern a little as when I got to round 16 it was still way too big! so I added two more rounds of decreasing rows to pull it in a bit more :
Round 15: Work 1Ps in same st as joining and 1 Ps in next 2 st, 2Pstog, *1 Ps in next 3 st, 2Pstog.* around, join.
Round 15a: Work 1Ps in same st as joining and 1 Ps in next st, 2Pstog, *1 Ps in next 2 st, 2Pstog.* around, join.
Round 15b: Work 1Ps in same st as joining, 2Pstog, *1 Ps in next st, 2Pstog.* around, join.
Wendy x


adorable!!! great tutorial as well!
ReplyDelete