Friday, 23 October 2015

Knit It - The Date Maker

Hello, it's been a while, hasn't it! Goodness this year seems to have gone by in a whirl and I am still spinning from all the wonderful things that have happened, so much so that I have been struggling to know where to start with getting this little blog up to date and rather than procrastinate any further I've decided I am going to show off my recently finished knit, after a quick preamble to set the scene that is, by now you'd expect nothing less!

A few weekends ago it was the annual IWM Duxford air show, I thoroughly enjoyed last years event despite a very early start, so I knew that I would have just as much fun this year, weather permitting, so ordered some tickets and popped along!


I was not disappointed, the weather turned out to be utterly perfect and the show was just spectacular! As it was the 75th Anniversary celebrations of the Battle of Britain there were lots of warbirds in flight and lots and lots of Spitfires (I do love a Spit). I won't overwhelmed you all with all my pictures here, but there are many more over on Flickr if that takes your fancy!

I'd decided if the weather was going to be anything like it had been for most of the summer (read: cold and windy) then I was going to need a good cardigan to keep the chills at bay. So I searched The Vintage Pattern Files for some inspiration (about time I used it myself!) My criteria was simple it needed to be 1940s in style and relatively quick to knit, as I only had about three weeks until the show. After a little searching, I found the perfect pattern, one that has actually been nearing the top of my knit list for ages, it was finally time to make a date with The Date Maker!

~ Date Maker Sports Jacket ~
Columbia Style Book 1946
Free Pattern: 
Size: 
38-40" Bust
Yarn: 
Needles:
US size 7 / 4.5mm

Wendy at Duxford Airshow 2015 wearing her newly finished Date Maker jacket


So I had my pattern, but there was just the small matter of re-sizing to contend with. The pattern is designed for a 32-34" bust so I was going to need some major up scaling for it to fit my 38-40" measurement. I had a quick look on Ravelry to see if anyone had any advice for resizing but found nothing, so I settled back and knitted many, many, many tension squares on various different sized needles and yarns. It was totally worth the effort, as after all my testing I discovered that because my knitting style is loose I could use an Aran weight yarn and the recommended 5mm needles, and get the extra inches I needed for it to comfortably fit me without having to change anything else!

1940's Date Maker Sports Jacket Columbia Style Book 1946 Free Pattern

When choosing a colour I just knew it had to be red, no indecision there, so I ordered some really lovely Stylecraft Cardinal yarn from Wool Warehouse and waited impatiently for it to arrive. Luckily it turned up on the Friday just before the summer bank holiday, which meant I was able to make the most of the extra time off I had and devote it to knitting! That extra time and the fact that this is a super quick pattern to knit meant that it only took me 3 weeks (22 days to be exact!) to knit, block and sew together, for me (a slow knitter) that really is a record!

1940's Date Maker Sports Jacket Columbia Style Book 1946 Free Pattern
The pattern is very simple to create and after a few repeats very easy to remember. Essentially it's a rib pattern, which is staggered either side of the centre 2 stitches, which creates the wonderful diagonal lines which make this jacket so appealing! The first row is where you stagger your three knit and purl stitches in the direction you want the diagonal to go. The second row is what I call a confirmation row, it's where you knit all the purl stitches and purl all the knit stitches, essentially using the row below as a guide, which is great as it gives you a chance to rest your mind for a bit!

1940's Date Maker Sports Jacket Columbia Style Book 1946 Free Pattern

After knitting all the sections, I blocked each piece to ensure that it came out to the size I needed, this worked really well, apart from Beau choosing to sleep on the back section while it was drying, meaning the ribbing got a little more flattened that I was hoping for, though I am sure after it's next washed it should spring back! Once it was all dry I knitted the cuffs and attached them to the sleeves before seaming up the sides. I have to say the sleeves are my favourite part of this pattern, I love how they look with the V's running up them, that said I still have a dislike of knitting sleeves which can be felt by the fact I could have knitted them a smidgen and a half longer (probably 2" if I am honest) as they are just on the edge of being long enough for my gangly limbs!

1940's Date Maker Sports Jacket Columbia Style Book 1946 Free Pattern

After joining all the body sections together it was time to crochet around the neckline. I have to say I found this the most tricky bit of the whole process, as no matter how hard I tried I could not stop the points of the neckline curling up, I figure it's designed to be worn with a collared blouse so I am not too worried about it, though it is irritating!

1940's Date Maker Sports Jacket Columbia Style Book 1946 Free Pattern

Next was knitting the waistband. I started by knitting to the measurements of the lower edge of the jacket, adding a few extra inches for the buckle flap, but once I tried the jacket on realised my error, it was just too baggy and the buckle was not going to be able to cinch the waist in at all. So reluctantly I unpicked the band and re-attached it, this time, stretching it against the lower edge as I stitched so that it would give pull in a little more and give the jacket more of a blouse effect which would fit my body more snugly!

1940's Date Maker Sports Jacket Columbia Style Book 1946 Free Pattern

Last up was covering and attaching the buckle, I used this video to help me crochet over the buckle and then attached it to the lower edge of the jacket, it's only later that I realised I had sewn the waistband on the wrong way, blast, it should close right to left, not left to right, but who's going to know, well apart from me and you, and you won't tell will you!

Wendy at Duxford Airshow 2015 wearing her Date Maker Jacket

So I had finished it in time for Duxford, and there was no frantic sewing in of ends on the way there either, which is utterly unheard of! As it turned out the weather was the warmest had been all summer and so I did feel a little bit toasty, as the fabric created by all the ribbing is quite dense, but I loved wearing it so much that I persevered through the heat! I have actually worn it quite a bit since and can honestly say it's the comfiest thing I have knitted so far.

So there you have it my first finished knitted and my first blog post in simply ages, I now just need to fill you all in on all the other fun stuff that has happened while I have been away, this could take some time!

Wendy x

Tuesday, 21 July 2015

Sew It - Spring For Cotton

Eek has it really been three months since my last post, blimey! Well, I had better get on with showing off my Spring for cotton project before it gets too cold to wear it!!


~ 1940s Style Sweetheart Sundress ~
Pattern:
By Hand London's Kim Dress
+ Side Pocket Tutorial - Youtube
Fabric:
2m Custom printed medium weight cotton
1/2 meter White medium weight cotton
Size Made: 
16 UK - With Adjustments

I really enjoyed making this dress, so much so that as soon as I had finished and photographed it, I unpicked it all started again!


Okay, it wasn't actually the love of the pattern that made me do this, even I know that would be bonkers! What actually happened was, I'd finished the dress before the deadline and was super proud of myself, pats herself on back, but I was so keen to finish it that I forgot to check the fit, after my initial pinning stage, and just went full steam ahead into finishing it as soon as I could, so, lo and behold the moment I tried it on, I realised it was way too large in the bust area!

Front Bodice
I always have a bodice fitting issue with sleeveless dresses, I usually have to adjust the straps or bust somewhere along the line, as my bust is proportionally smaller than the standard pattern size for the rest of my torso, but even after the usual adjustments it was still too big; if I'd have left it as it was I would have ended up flashing my undies every time I lent forward, and that was just not the look I was hoping for. So rather than leave it as is I decided to bite the bullet and unpick it all and start from scratch!!

Adjusted bodice
I am glad I did, as I know I would have never worn it otherwise and it's too pretty not to wear. The fabric did struggle a little with all the unpicking, being a printed cotton, there were holes left in the print by the unpicked stitches but as I was taking it in they hardly show as they are mostly hidden in the seam allowance, though around the waistband the are a few rouge ones.

Back View

The pattern was a dream to sew, the most difficult part was the bodice, as there are quite a few pieces to it which give it shape without the need for darts (it's all very clever) and it's lined, that said it was not too tricky, though I seem to have puckered the back seam (see above photo back seam on the right) when under stitching and so it won't press out, I don't know how I managed it but as it's behind me I am not going to worry about it. Also, the concealed zipper has not been quite as well concealed the second time around, but I really don't mind as I rather like the contrast, so I am going to see it as a feature rather than a flaw!

Not so invisible zip and gathered waist

I managed to get the whole dress out of the 2 meters I had, which was quite a squeeze, but as the skirt was gathered I just added less to the width, which worked out rather well as it is quite a stiff fabric the skirt benefited from being a little less full. Also, the mismatching of the pattern which I mentioned in my last post doesn't really notice that much which is what I was hoping for!


I have worn it a few times over the last few months, when the weather permitted, and I have found it great comfy dress to wear, I must confess to always wearing it with a blouse (see my Instagram for the evidence) or cardie over the top, as I have a dislike of showing off my arms especially at work. Oh, I nearly forgot, I added some side seam pockets to the skirt on the second stitching, which are so simple to do and make the world of difference to how much wear it will get, as pockets are soo useful!

Okay, all that is left to do is to give you an awkward (slightly surly) picture of me wearing it, one day I promise I'll get better at having my photo taken!


Wendy x

Tuesday, 21 April 2015

Spring For Cotton - My Plans

Hello I hope the week is being kind to you so far and that you all had fabulous weekends! I certainly did, I spent mine giving my flat the spring clean of its life and absolutely wearing myself out in the process! It was certainly worth it, though, as there is nothing nicer than having a gleaming house, even if it will only last a few weeks (OK, days)! As well as cleaning like a demon, I even managed to fit in a bit of work on my project for 'Spring For Cotton'.


As you might have guessed, seeing as this is the first time I have mentioned it here, I decided quite late in the game to take part. The decision was really made for me once I received my Kickstarter reward from By Hand London. Along with the gorgeous patterns and other neat stuff, I also got 2m of printed fabric which I got to design!


I knew when By Hand London announced their Kickstarter plans for fabric printing I would have to help them out, as there was a particular design that I had been dreaming of for years. The eagle eyed amongst you may have already spotted where this pattern comes from. Here is a closer look.


Well the design is a little different to the original, I have moved a few things about a little and added some more buttons & pins and changed the background colour, but essentially it's the design from the title pages of and Odhams classic from the 30s, a book many UK based vintage sewers will probably have come across.

The Pictorial Guide to Modern Home Needlecraft 1938,  is one of the first books I bought on ebay when I first figured out how to buy things on ebay, many, many years ago. Once I saw the title pages I was smitten with the design thinking it would make the most wonderful fabric, though it never occurred to me then that I should try to make it myself!


There is a little flaw in my beautiful fabric. I sized my pattern up to make a fat quarter, but sadly when printing, the pattern didn't flow, my error in my naivety at this pattern printing malarkey, so the 2m is essentially made up of slightly misaligned fat quarters, which is irritating, as it restricts the patterns I can choose, but it's not the end of the world as I can work around this to a degree and heck I like a challenge!

So with my 2m of cotton fabric in hand, next it was time to choose a pattern. Initially I though I'd make a simple 50s circle skirt, as I figured that it would hid the flaws in the pattern due to all the swishy fabric. But then the weather got really warm and I remembered how much I love the cotton sun dresses from the 1940s, especially ones with sweetheart necklines (honestly if the shops started selling dresses with sweetheart necklines and peplums I think I would never sew again!), so I went through my pattern stash to see if there was anything suitable.

This 1950's bodice pattern is available for Free Here!
Kindly shared by Miss Dixie O'Dare

Unfortunately nothing quite hit the spot, most needed some serious resizing, and with the ever increasing demands on me at the moment, I just knew I wouldn't be able to find the time to 'toile' away the hours. So I decided to go with vintage inspired rather than true vintage, and turned to one of the patterns I got in my Kickstarter reward, the Kim Dress from By Hand London.


It was only when I slid the pattern out of its outer envelope, that the second option of a dirndl skirted sweetheart neckline dress, was revealed to me! So though it is a thoroughly modern pattern (aaaah, multi-sizing) it's certainly one that has 1940s styling potential. It all seems very simple to make up so far the bodice is all but done and the simple dirndl skirt should mean that I can squeeze the whole dress out of the 2m of fabric that I have, fingers crossed!

Wendy x

Monday, 6 April 2015

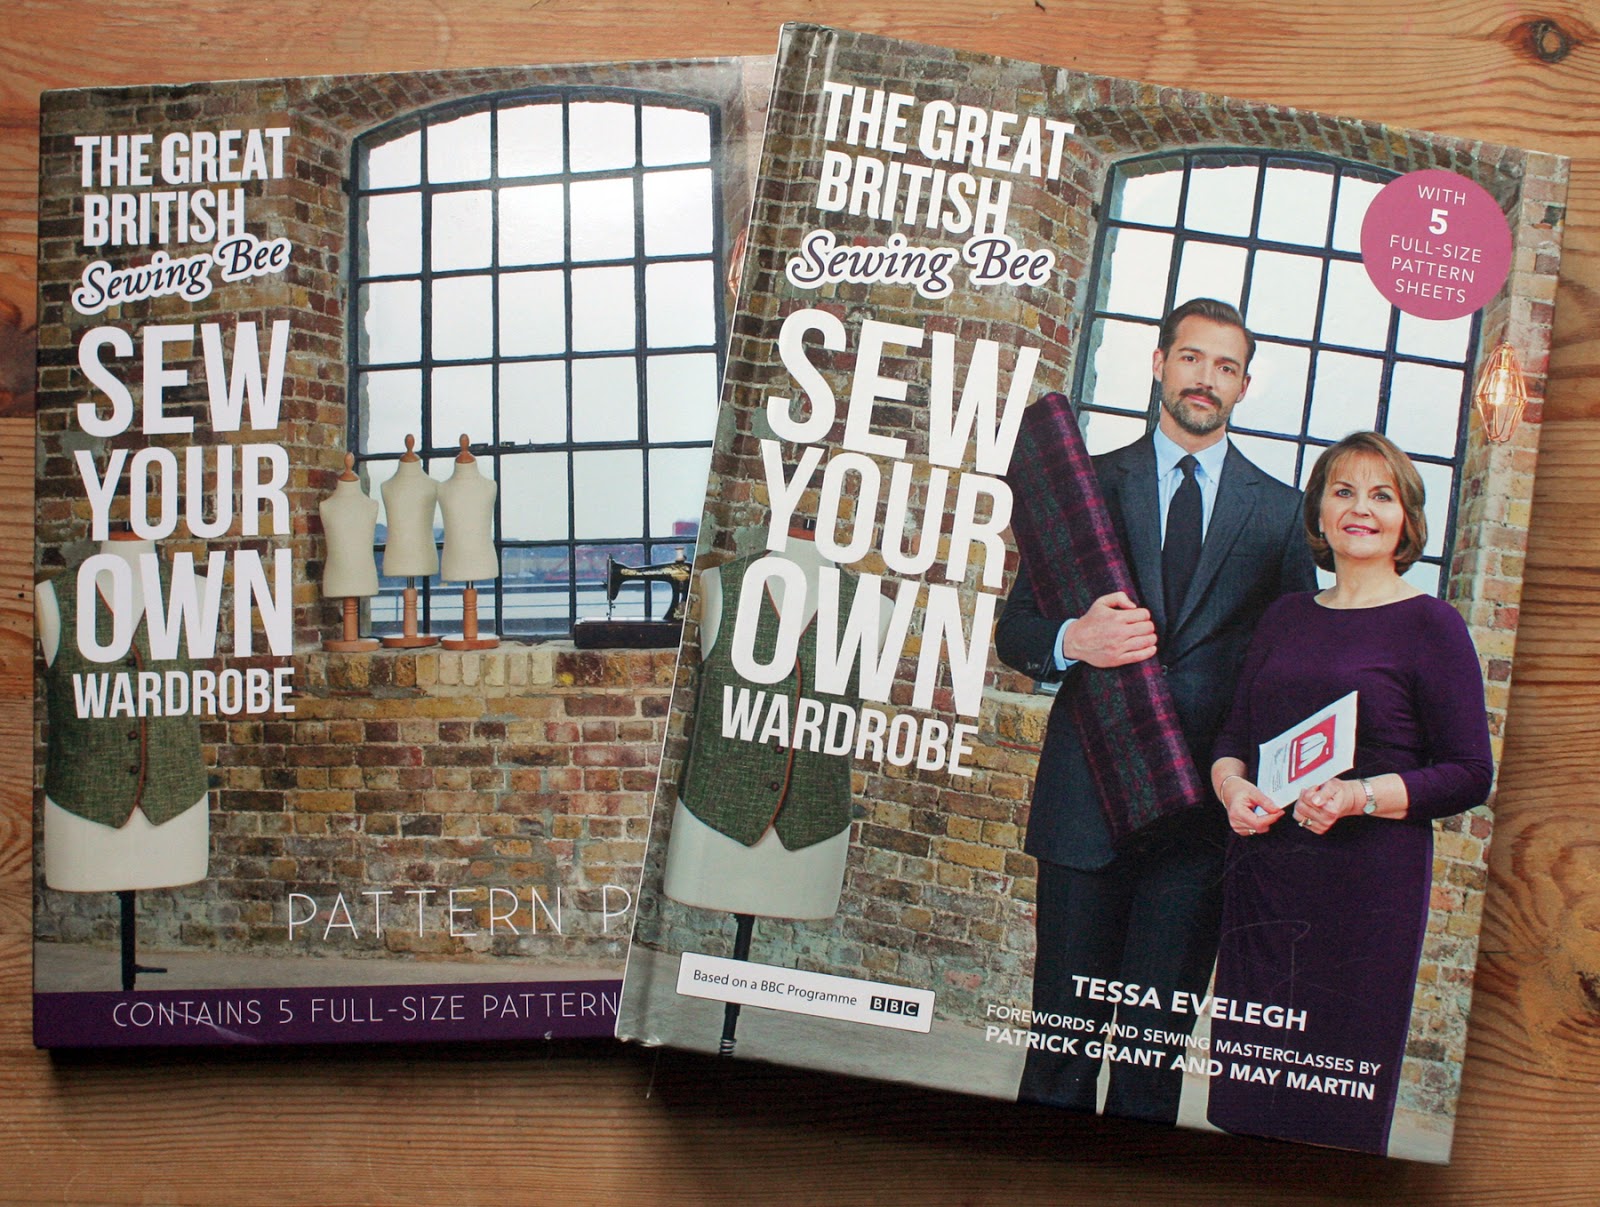
Read it - TGBSB: Sew Your Own Wardrobe

I love books. If anyone asks me what I want as a gift, nine times out of ten I'll point them in the direction of a book I've been lusting after, usually on Amazon. My poor billy bookcase is straining under the weight of the multitude of sewing, knitting, gardening, cookery and history books I have collected over the years.

The Butterfly Balcony Review of The Great British Sewing Bee: Sew Your Own Wardrobe
That shelf is definitely sagging under the weight of all those words.


Having such an extensive library and not a lot of space, new arrivals have to earn their place upon my shelves. When I buy a book I like to know exactly what I am getting, if it's going to contain patterns then I want to know exactly what patterns! Oddly this is not always so easy to find out, most reviews and online stores only show you snippets of what's included, a taster to whet your appetite but not necessarily inform you as to what is inside. I find this frustrating so I've decided to do a few quick reviews of some of the books I own in an effort to help those of you, who like me would rather have the full picture before making the decision to add this book to your collection!

Seeing as The Great British Sewing Bee has recently been back in the limelight it seemed only right to start with a book from the series. Unconventionally I am starting with the second book as it's the only one so far I have made something from so feel I can give you a more well-rounded account. Right, let's take a closer look!

~ The Great British Sewing Bee: Sew Your Own Wardrobe ~
By Tessa Evelegh with Forewords By Patrick Grant & May Martin
Published by Quadrille 2014
RRP £25.00

The Butterfly Balcony Review of The Great British Sewing Bee: Sew Your Own Wardrobe

'An accompaniment to the hit BBC series presented by Claudia Winkleman and judged by Patrick Grant and May Martin, The Great British Sewing Bee: Sew Your Own Wardrobe is a practical sewing book brimming with fantastic projects, including a core of wardrobe essentials including a pencil skirt, easy T-shirt top and a wrap dress. Menswear and retro garments are also included, as well as a fun selection of designs for babies and small children. Dress sizes range from (UK) 8 to 18 and the book is full of inspiring photography so you know exactly what you're looking for - and the included pattern pack, containing five full-size pattern sheets, makes creating your wardrobe even easier.' (Quote from Quadrille)
The Butterfly Balcony Review of The Great British Sewing Bee: Sew Your Own Wardrobe

TGBSB: Sew Your Own Wardrobe, is the second book in the series and was produced to complement the second series of TGBSB, which aired in 2014. The book has been broken up into four chapters Basics, Fabric, Fit and Finish.

~ Basics ~
The first Chapter is 'Basics' which deals with the skills and techniques you'll need to complete the projects in the later chapters plus two self-draft / no pattern garments.
The Butterfly Balcony - Review of The Great British Sewing Bee: Sew Your Own Wardrobe
~ A-Line Pinafore ~ Glorious Gown ~


 Also included are the sizes for all of the adult projects in the following chapters:

Men's:
Small: 34-36" chest / 28-30" waist / 35-37" hip
Medium: 38-40" chest / 32-34" waist / 39-41" hip
Large: 42-44" chest / 36-38" waist / 43-45" hip
XL: 46-48" chest / 40-42" waist / 47-49" hip

Women's:
UK 8: 31.5" bust / 24" waist / 33.5"hip
UK 10: 32.5 bust / 25" waist / 34.5" hip
UK 12: 34" bust / 26.5" waist / 36" hip
UK 14: 36" bust / 28" waist / 38" hip
UK 16: 38" bust / 30" waist / 40" hip
UK 18: 40" bust / 32" waist / 42" hip

The remaining three chapters contain all the pattern instructions.  Each pattern has a difficulty rating and falls in one of four levels Easiest, Easy, Moderate and Tricky.

~ Fabric ~
The Butterfly Balcony - Review of The Great British Sewing Bee: Sew Your Own Wardrobe
~ Aztec Leggings ~ Men's (?) Waistcoat ~ Silk Tunic ~ Anorak ~ 
~ Teddy Pram Suit ~ Prom Dress ~ Easy-sew Short Skirt ~ Men's Shirt ~


~ Fit ~
The Butterfly Balcony - Review of The Great British Sewing Bee: Sew Your Own Wardrobe
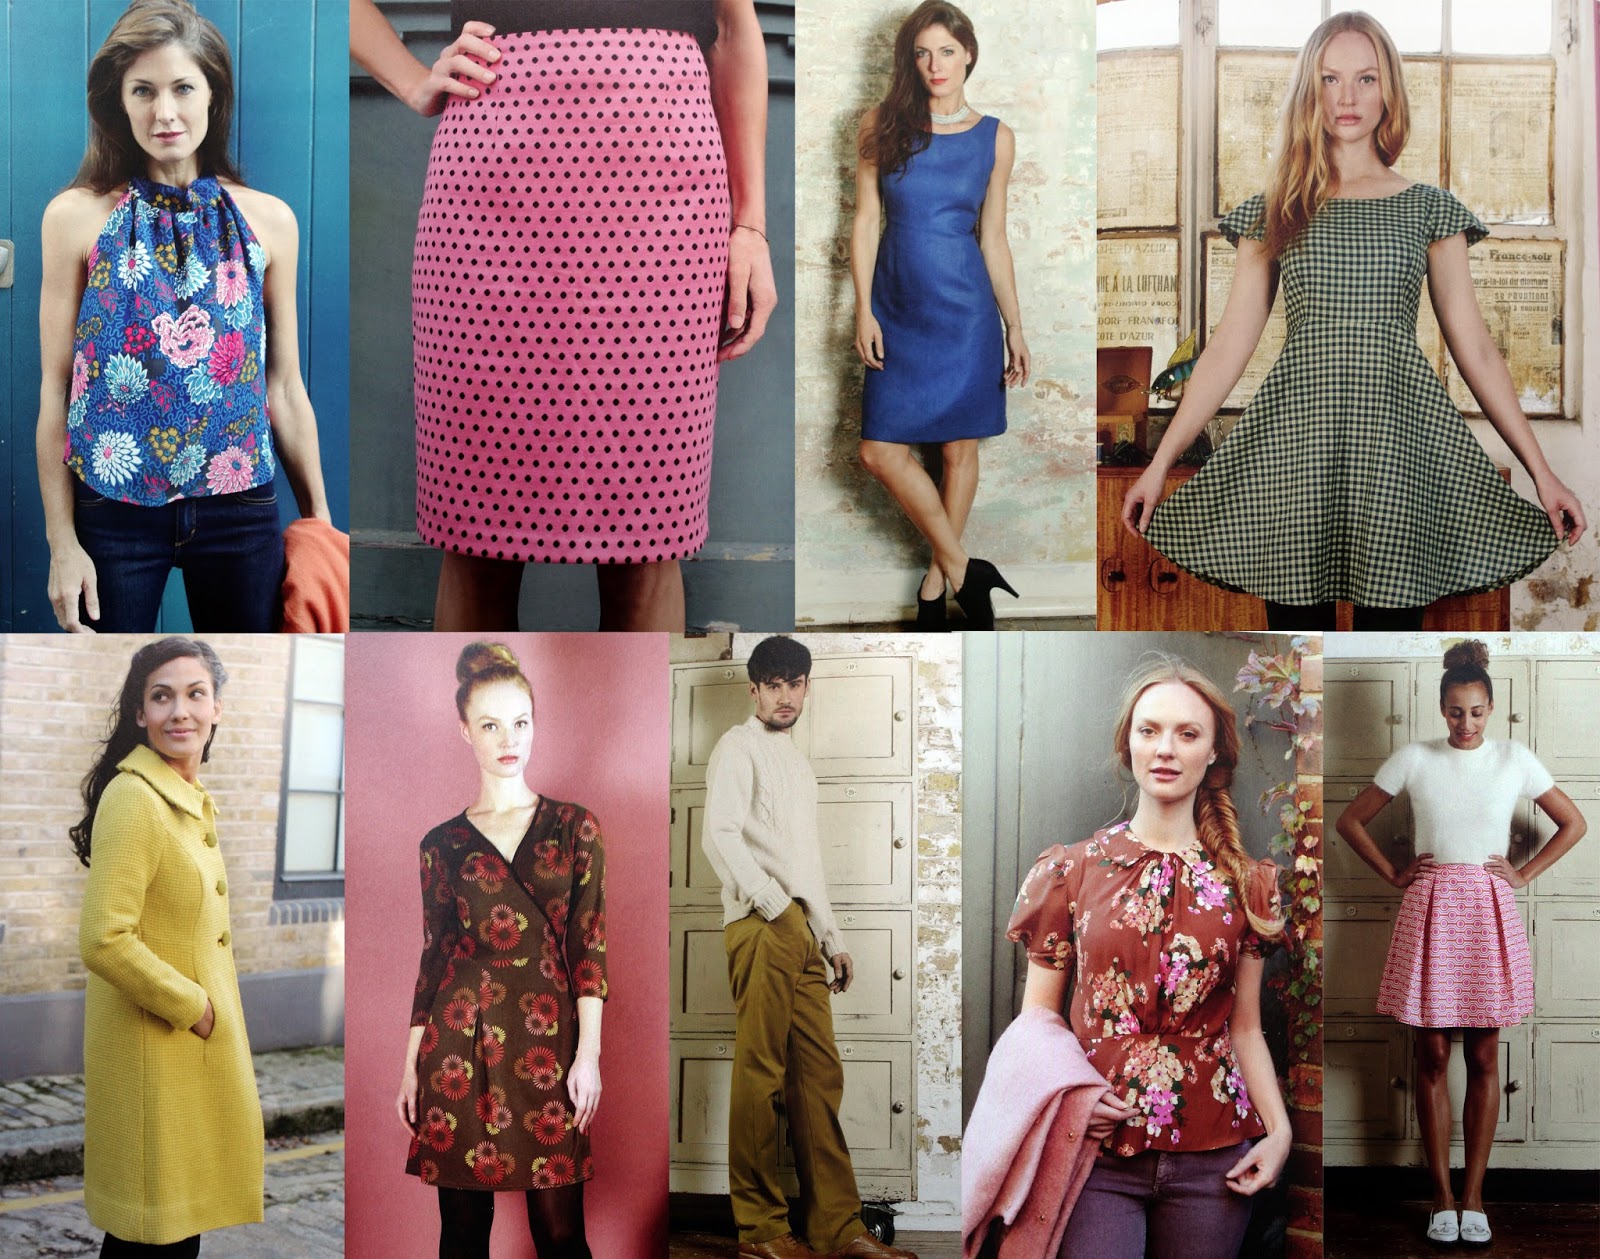
~ Draped Top ~ Pencil Skirt ~ Shift Dress  ~ Full Skirted Dress ~ 
~ 1960's Coat ~ Wrap Dress ~ Men's Trousers ~ 1930s Blouse ~ Box Pleat Skirt ~


~ Finish ~
The Butterfly Balcony - Review of The Great British Sewing Bee: Sew Your Own Wardrobe
~ Simple T-shirt ~ Yoke Skirt ~ Baby Dungarees ~ Slip Dress ~ 
~Women's Bowling Shirt ~ Baby Dress and Knickers ~ Girls Dress ~


All the patterns for Fabric, Fit and Finish are contained in a separate folder, multi-sized and ready for you to trace off and get sewing. There is also a link HERE to Quadrille's page for the book where all the patterns are available as individual PDF downloads!

The Butterfly Balcony - Review of The Great British Sewing Bee: Sew Your Own Wardrobe


~ The Good Points ~
~There are a good range of patterns for all the family and there to my mind at least there are no pesky fillers! There are even 4 for patterns men, which is a lovely surprise and about time too! Though that waistcoat definitely has the buttons on the wrong side for boys!
~ The book is beautifully designed and photographed making it an inspiring book to have on your bookshelf and at your sewing station!
~ There is a section on taking your own measurements and checking your silhouette which is really very useful.
~ No annoying dust jacket! Is it just me who finds them frustrating on craft books, they always get creased and bent and end up looking tatty!
~ All the patterns are included full size in the book meaning you don't need to re-scale or download anything before you get started, just grab your tracing (or baking) paper and your good to go! Plus the fact that there is the option for PDF's, is a great addition!
~ Did I mention there are LOADS of patterns! For a hardback book with 24 sewing patterns, it's a bargain! The cheapest I could find in the UK was for £6.00 from Amazon, which is a whole lot of patterns for under a tenner!

The Butterfly Balcony - Review of The Great British Sewing Bee: Sew Your Own Wardrobe

~ The Not So Good Points ~
~ The pattern sheets are a little confusing as the pieces are not necessarily all on the same sheet or in the same colour, but having access to printable PDF's negates this somewhat.
~ You will need to jump about the book a bit to find all of the instructions for some patterns which can be a little confusing.
~ Some things just get a little glossed over and not properly explained (see my post about The Men's Shirt) and there are sections where the proofreading seems to have been overlooked, such a shame for a book all about precision. As long as you are not a complete beginner you will be able to muddle through the discrepancies in the instructions, keep youtube tutorials on standby people!
~ It would be really helpful if every pattern had good clear images of the garment, the artistic photos are gorgeous, but from a practical point of view, it's not always that easy to see the construction of the garment that clearly.

The Butterfly Balcony - Review of The Great British Sewing Bee: Sew Your Own Wardrobe


~  My Verdict ~ 
TGBSB: Sew Your Own Wardrobe is all about learning the art of precision sewing; sewing that May and Patrick would be proud of, which perhaps means that this book is not really aimed at those who are just starting out (despite its claims). Most of the patterns are a little more difficult than basic so will be great for taking your existing skills up to the next level, but perhaps not so suitable for those wanting to dip their toe in the water for the first time, rather something to work up to!

The Butterfly Balcony - Review of The Great British Sewing Bee: Sew Your Own Wardrobe

The patterns in the book are all great, to my mind there aren't any fillers. The real standout patterns for me are the Men's Shirt, the striking yellow 1960s Coat, the 1930s Blouse and the loose T-shirt, which looks lovely and simple to make plus very comfortable! Oh and the teddy suit for a baby is so adorable that makes me tempted to have one of my own, almost! I was lucky enough to get my copy as a Christmas gift, but I certainly think it's worth spending your pennies on, the good points about this book certainly outweigh the bad and I really think it would make a great addition to any sewers bookshelf!

The Butterfly Balcony - Review of The Great British Sewing Bee: Sew Your Own Wardrobe

I hope that you enjoyed this review and if you have been pondering buying this book I have helped you to make a more informed decision!

Have you got this book, what did you think?

Wendy x

Saturday, 4 April 2015

The Kitchen Front - Vegan Cocoa Cake

The healthy eating plan I put myself on early in the year essentially allows me to eat most things in moderation apart from anything processed and anything containing refined sugar (which when you cut out processed foods you pretty much cut out sugar without trying, it's in everything!). This actually is not too much of an issue as I have much more of a savoury tooth than a sweet one and the fact that I've had an issue with dairy for the last year or so, means that I have already cut back on my Cadbury's consumption dramatically, now I only eat dark chocolate which I am slowly growing to enjoy, slowly.

But Easter is a challenge, as chocolate is everywhere! I muddled through last year by having a small bit of chocolate every now and then so as not to feel left out, but this year with me actively seeking to avoid sugar (my skin is thanking me already!) this time there are no concessions, and certainly no Cadburys. So I went searching for a replacement recipe, and this is when I found the wonderful Rachel Khoo's new website which had the very thing I had been looking for! Rachel is the wonder behind Little Paris Kitchen and she is adorable! 


It's a vegan, dairy-free, gluten-free, sugar-free (well refined sugar, natural sugar is allowed) cake, which is so full of healthiness, that you could almost say it's good for you! I have made a few tweaks to the original recipe, as I am incapable of following the rules, so my version is below, for the original recipe hop on over to Rachel's website!

~ Vegan Black Bean Cocoa Cake ~

Ingredients:
20" Cake Tin & Greaseproof paper for lining
400g Tin of Black Beans - Washed and Drained
* 100g Dates Pitted
3 Desert spoons of Coconut Oil
80g of Flaxseed/Linseed
* 80g Cocoa Powder
2 tsp Bicarbonate of Soda
2 tsp Baking Powder
150g Maple Syrup
1tsp salt - I left this out as my beans were in salted water

Topping:
2 Ripe Avocados
* 4 tbsp Cocoa Powder
Maple syrup to taste
 Honey
Desiccated Coconut

* If you wanted to make this recipe even healthier you could substitute:
- Cocoa Powder for Cacao powder (there is a lot of cocoa in the recipe so it may be a bit expensive)
- Dates for Medjool dates which are bigger sweeter and a little less pithy than their smaller cousins.


1. Start by grinding up the flaxseed/linseed into a flour. The easiest way to do this is to find the smallest container for your blender/food processor or coffee grinder (mine was a herb/spice attachment to my jug blender), this means there is less room for the seeds to escape to, so the seeds get crushed rather than just spinning around your blender like a vegan snow globe!

2. Drain and wash the beans (they don't smell very nice at this point, but don't be put off, it gets better, promise) put in the blender with the pitted dates and blend until smooth, this may take a while depending on the strength of your blender. If it gets too thick to blend properly, add a bit of the maple syrup to make it more liquid.

3. Add in the all of the dry ingredients and the maple syrup. Mix together until you have an even batter.

4. Line your tin and scoop your mixture in, smoothing as much as you can.


5. Pop in the oven for about 45 mins gas mark 5.

6. Once cooked, carefully tip out onto a plate so that it can cool. Be careful as the lack of gluten in this recipe means that it is dense but easily crumbly!

...Once cooled...

7. Make the topping. Put all the avocado pulp into a blender with the cocoa and blitz till smooth, add the maple syrup to taste.

8. Spread the topping all over the cooled cake.
As my blender struggled to make the avocado as smooth as I would like (green chunks in your icing anyone!) I decided to add a sprinkling of desiccated coconut over the top to hide the green bits and then drizzled over some Manuka Honey to add a little more sweetness!


The verdict!
De-flipping-licous! It's gooey, chocolatey and rich, which is absolutely everything you want when craving an Easter sweetness fix! What's also great is that by day 2 the flavours have mellowed a little and so it tastes even better! Another thing, because it's jam packed full of black beans it carries a hefty protein punch, filling you up for longer and kerbing your sugar cravings!


 I will totally be making this recipe again, I think it would make perfect little cupcakes, though I will tweak the recipe a tad, instead of 80g of Linseed, I will use half ground almonds and half linseed, as it did leave a bit of an aftertaste (though not unpleasant just slightly unusual, though by day two it had dissipated).


So delighted was I with this recipe, that I rang my mum to tell her about it. After I'd explained what was in it, she was utterly horrified (I have never heard my mum say erghh! so many times before) and she could not understand why I would even try it! Though I have a cunning plan, the next time she visits I am going to bake it as I am convinced that she will change her mind once she has tasted it, though I won't be mentioning the ingredients until she's on her second slice!

Wendy x